How to Repair a Flat Roof
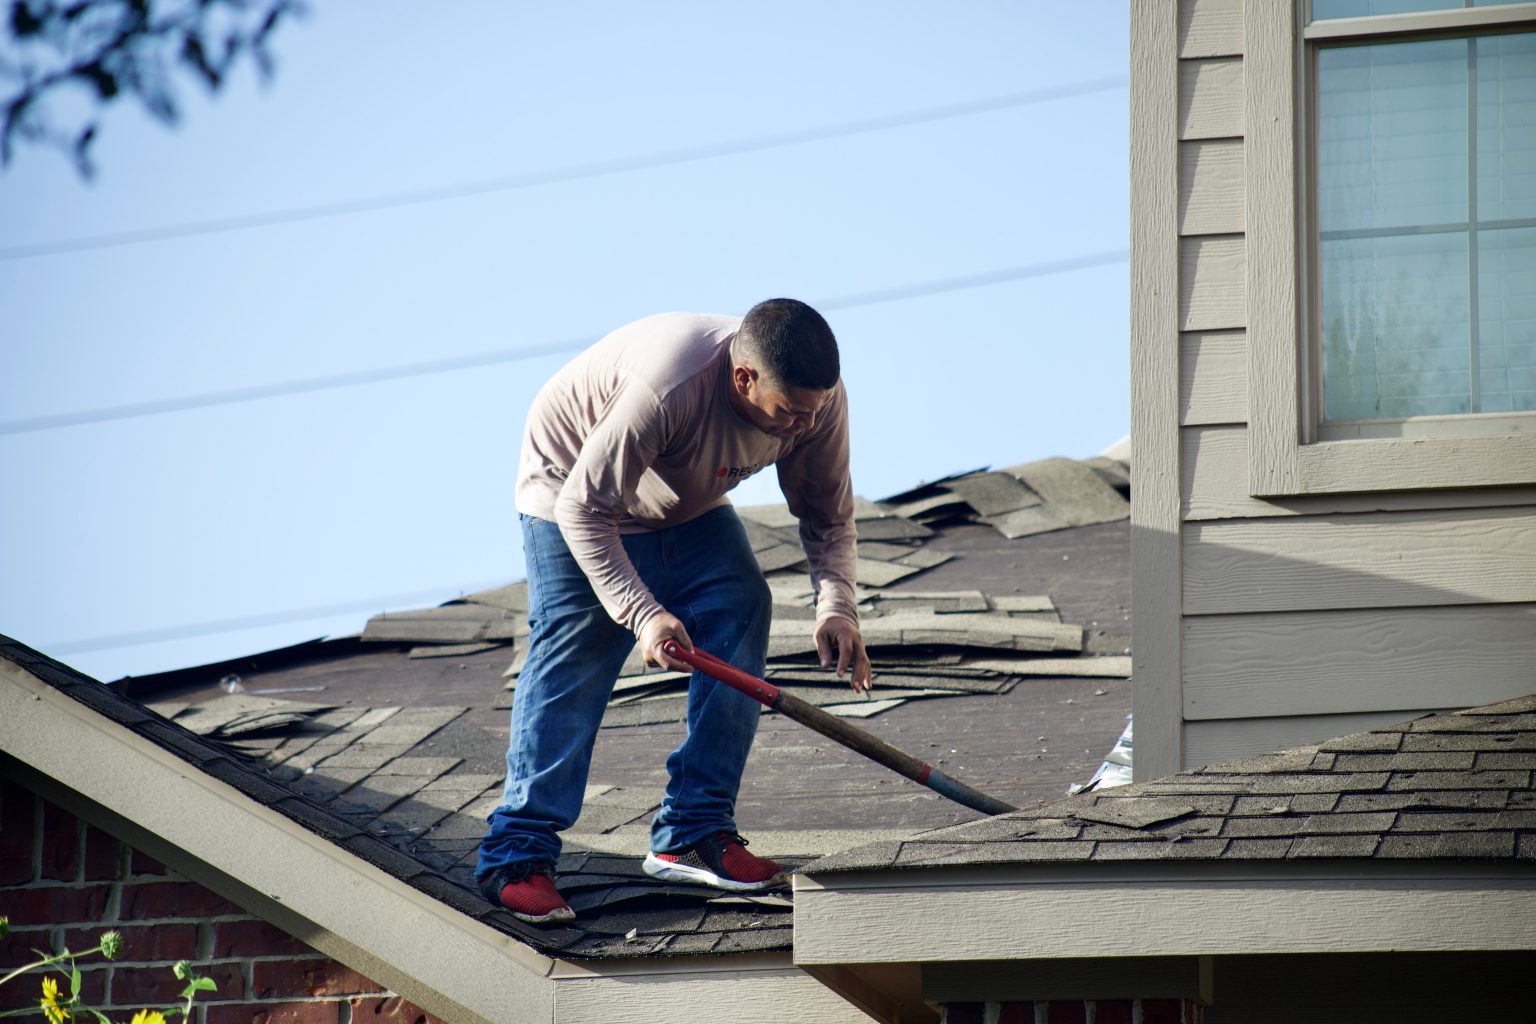
While called a flat roof, such roofs are only mostly level, having a slight slope to drain water. However, because the slope is small, it requires different materials to stay watertight. Usually, you do not have to worry about them, but every once in a while, you need to look for cracks and other types of damage to stop a leak before it happens.
You might see a flat roof on older houses or in arid areas, and they are usually made of asphalt, rubber, PVC, or similar synthetics. These materials are quite simple to fix, and with regular maintenance to prevent significant damage, you can easily extend the lifespan of the roof.
The article will cover some of the important parts of repairing a flat roof, which include finding the damage, sealing small cracks and holes, using roof patches, and resealing a flat roof.
Find the Damage
Because water usually drips a bit before you can see it, finding where a leak is can prove troublesome. To locate the damage, you will start by estimating the location from the inside, searching for signs of a leak that will point you toward the location of the damage on the roof above. Then, you will identify any damage and look at the seams, followed by clearing up any debris and drying the area for the work ahead.
Use the Closest Walls to Estimate the Location
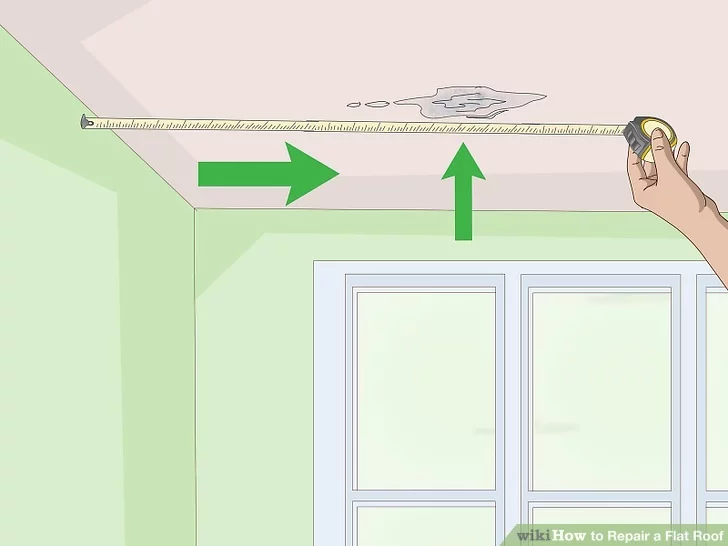
It will likely be difficult to find the leak if you immediately head to the roof to look. Instead, you want to go inside the house and use the closest walls to estimate its location. But first, you need to find areas that are wet or discolored due to water damage.
Once you find the spot or spots, grab a tape measure and use it to get an approximate positioning beneath the roof. Essentially, if you find a spot that is 12 inches from one wall and 25 inches from another, check the same area on the roof.
There is also a chance the first sign will be a damp, wet smell inside after it rains. In that case, it might be more difficult to track, but it is important to fix it as soon as possible to prevent damage.
Check the Slope Above the Measured Area
Make your way onto the roof, being careful as you do, especially if there is a chance of ice. Once you are up there, go to the area above the leaking area inside the house and look around. See if you can observe the slope to figure out how the water could flow into the rooms below.
Remember that most, if not all, flat roofs have a slope. It is meant to drain water, but it also means water can get into damaged spots higher on the slope and end up leaking through at a lower spot.
If you believe there are risks, make sure to have someone else with you as you get on the roof. You can also use a harness to secure yourself.
Identify Any Damage
Punctures, tears, and cracks are usually pretty easy to notice, so you want to look around and observe the state of the roof. Any area that looks worn might be the culprit, whether they be large or small. While large areas of wear or damage are the most urgent, small spots can quickly turn into additional headaches.
One of the reasons even small spots are problematic is that any water, no matter how little, will drain down into the wood framework underneath. That will lead to rotting and instability that could result in more serious problems later.
Assuming you do not let problems become serious, your roof can last around 25 years before it needs to be replaced. That means patching and repairing problems immediately, even the small ones.
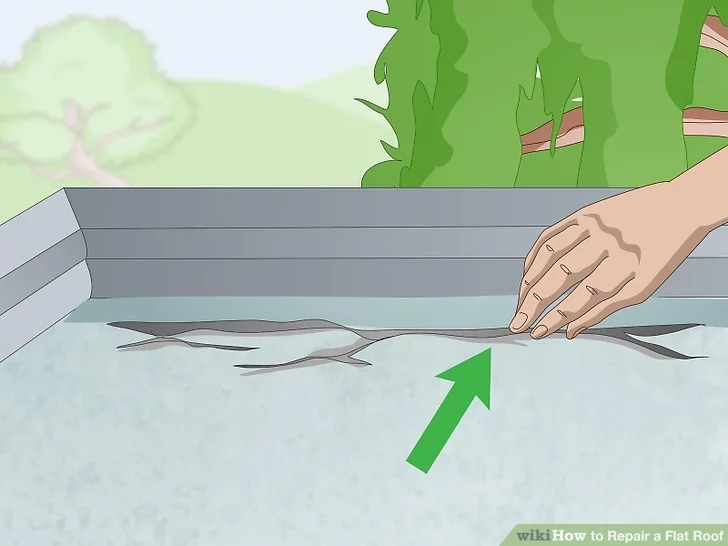
Look at the Seams
The seams of a roof can be trouble areas, with obvious signs being cracks and holes. In fact, if the surface of the roof seems fine, the seams are another likely cause of a leak, so you will want to look around the edges. If you find a problem, patch it much like you would a leak in the membrane.
Additionally, make sure you do not overlook other potential sources of a leak, like flashing, vents, chimneys, and other areas with space for water to get in.
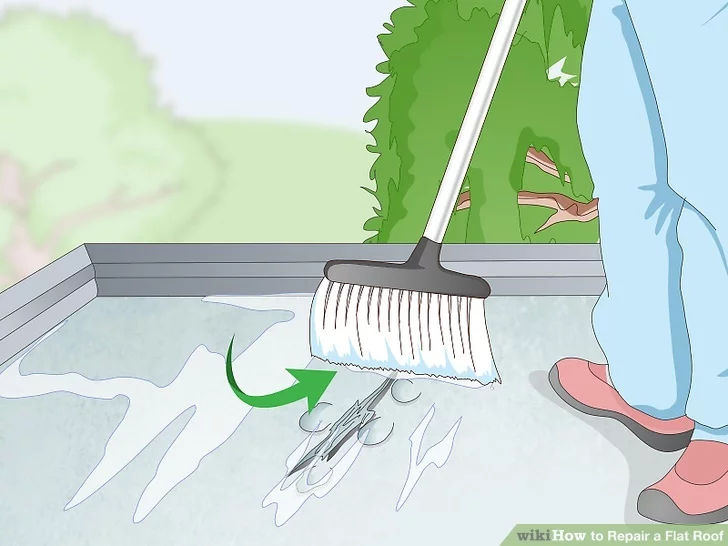
Clear Up Debris
It is important to clear away any debris or water from areas showing damage. Water and debris might stop what you use to repair the damage from properly bonding to the roof, meaning you will do the work for nothing. Plus, clearing it away makes it easier to see the damage. If you are unsure of what to use, grab a tough broom and clear away as much as possible.
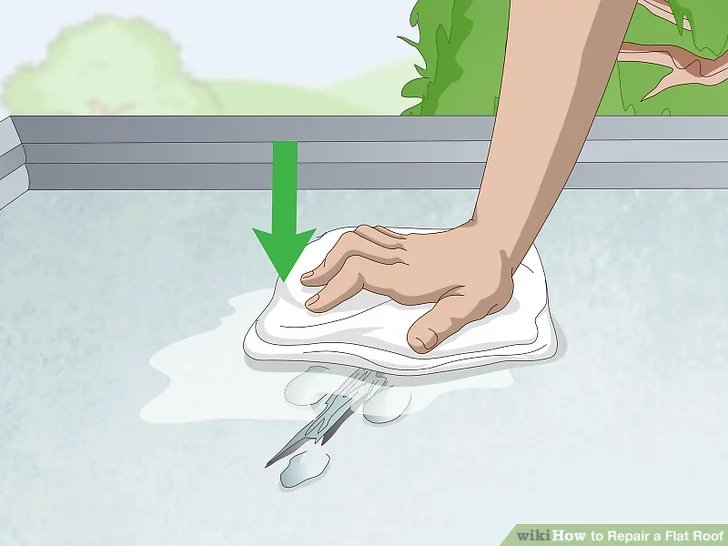
Dry the Area
Using a tough broom will take care of the debris and most of the water, but it will not completely dry the area. Always make sure to thoroughly dry an area before making repairs, though it is only a necessity in the areas you plan to use cement or sealant.
Effective drying methods include paper towels for small areas or a propane torch, though the latter carries risks of starting a fire if you are not careful. Another great method is letting the sun dry the roof, which is almost mandatory for large spots or when you plan to work on the entire roof. In that case, give it a few days to dry by itself.
Sealing Small Cracks and Holes
Small cracks and holes are common, and you can seal them in a few steps. To start, you will have to slice open blistered spots, followed by flattening the membrane. Once the area is smooth, you will apply roofing cement, lay out a fiberglass mesh layer, and add a final layer of cement. Lastly, you will use gravel to prevent sun damage.
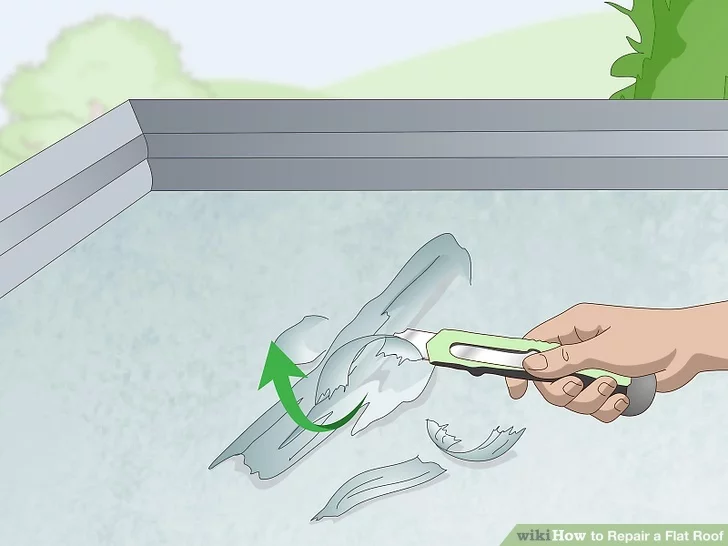
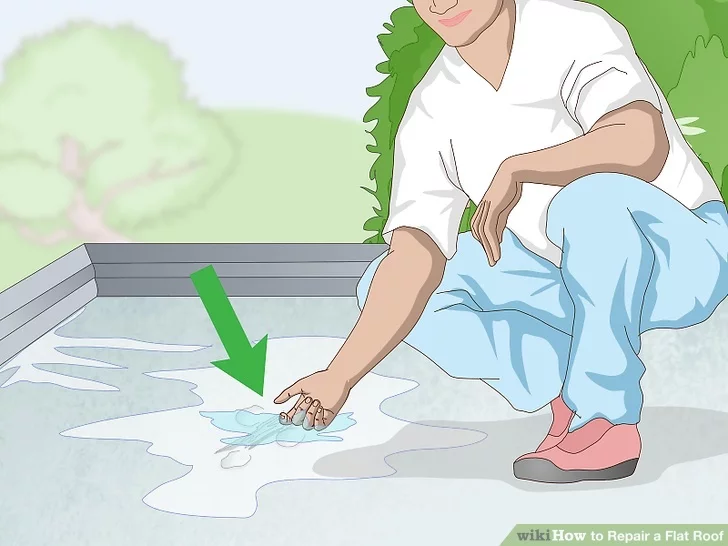
Slice Open Blistered Spots
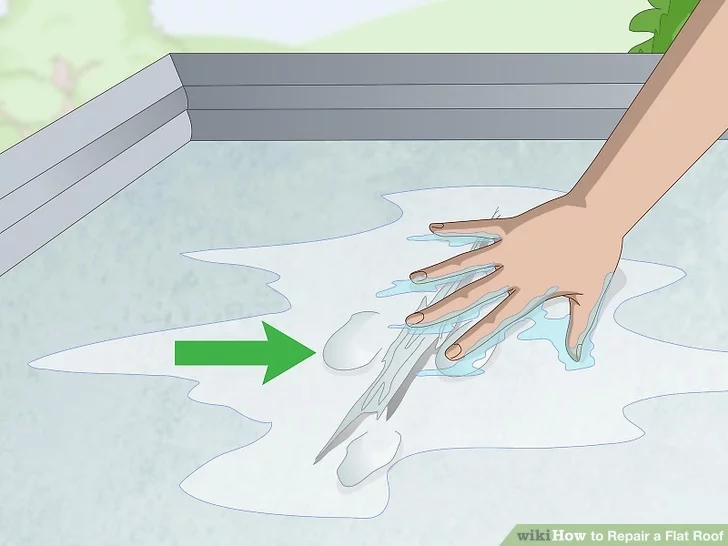
Blistered spots are areas with little bubbles on the roof caused by trapped moisture and overheating. You will want to cut them open using a utility knife. Start by popping each of the blisters with a shallow cut, being careful not to go deeper than the damaged portion. Once you have done that, scrape off the damaged material.
After scraping away the damaged material, make sure the revealed roofing is dry. Only once it is dry do you want to try to repair it.

Flatten the Membrane
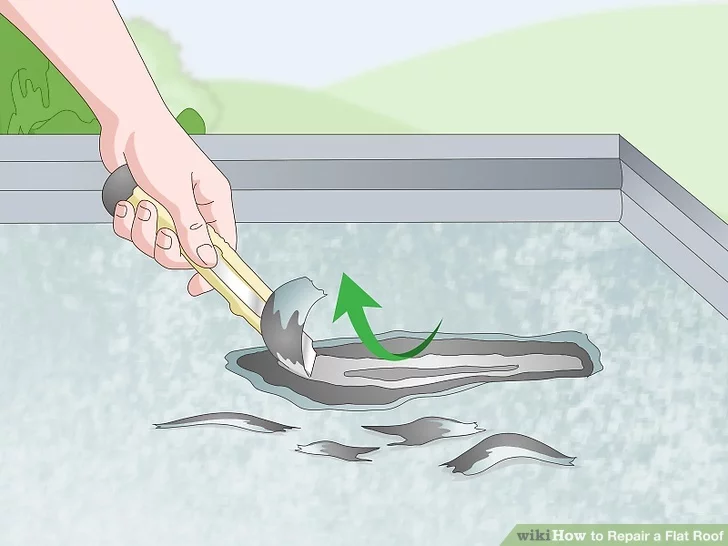
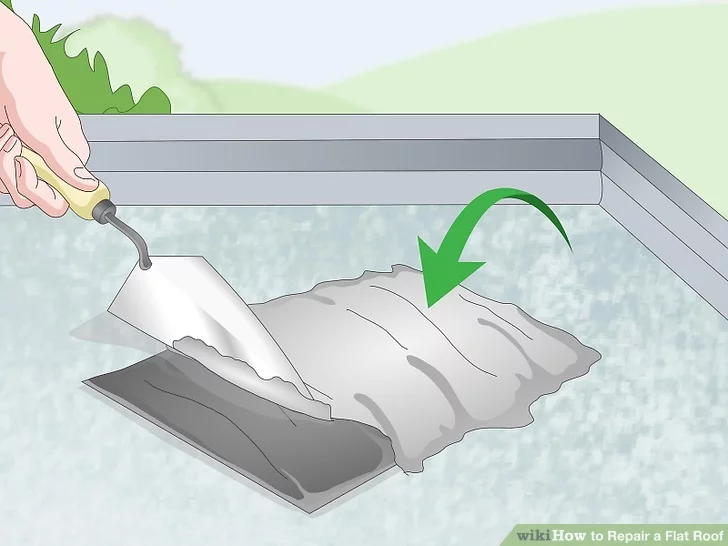
While you can fix small cracks and holes by pushing the sealant inside, it is not always easy. Another way to go about things is flattening the area using your utility knife, which involves making a cut and removing the material around the cut. When doing this, you have to be careful not to damage the layers below the damaged spot.
Keep in mind that the damaged portion of the roof can be used as a guide that tells you how deep to cut without puncturing the rest of the material. You can also use a trowel to lift cracked areas.
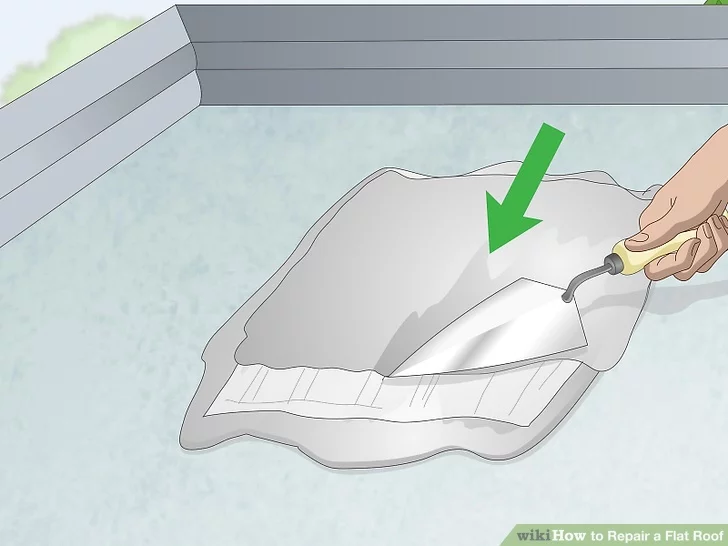
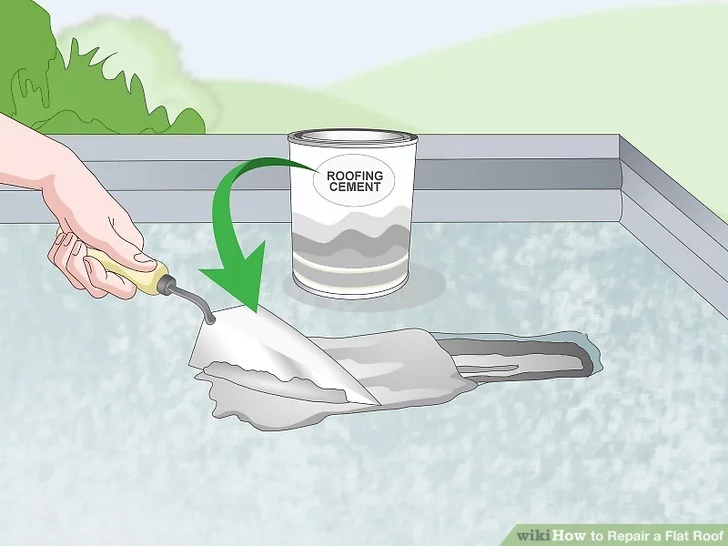
Spread Roofing Cement
The same trowel that can be used to lift cracked areas is a great way to spread roofing cement. The roofing will fill in gaps and provide waterproofing, and it works on many types of roofs.
The layer should be 1/8 of an inch thick, and it should be pressed into the damaged area. You also want to spread it approximately six inches past the damage and smooth it out, ensuring you can no longer see the crack when you are done.
Roofing cement is often found in cans, but some sealants will come in tubes for a caulk gun, which can make application easy. In fact, caulk can be used directly to seal small holes or cracks less than an inch in width. However, if you want to add a waterproofing layer, cement is a better choice.
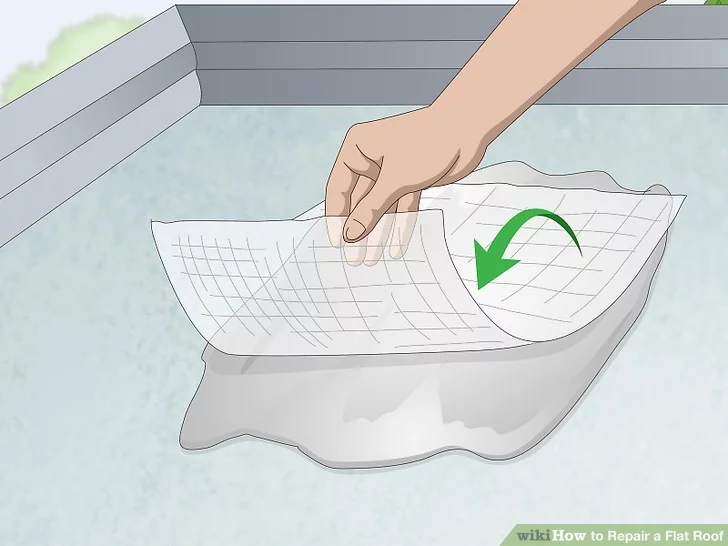
Lay Out Fiberglass Mesh
Fiberglass mesh is a useful addition to add a waterproofing layer to the damaged area. Moreover, it is an easy step that involves nothing more than cutting it to size and laying it on top of the cement layer. The only tool you will need is a sharp pair of scissors.
There is also something called fiberglass scrim, which is a light tape that serves as an alternative to the mesh. It is preferable for long, straight cracks and goes over caulk or cement.
Cover the Mesh With Cement
Once the waterproofing layer of fiberglass mesh is down, cover it with another layer of cement. The cement should cover the entire piece of mesh and be around half an inch in thickness. When you look, you should not be able to see any traces of the mesh whatsoever.
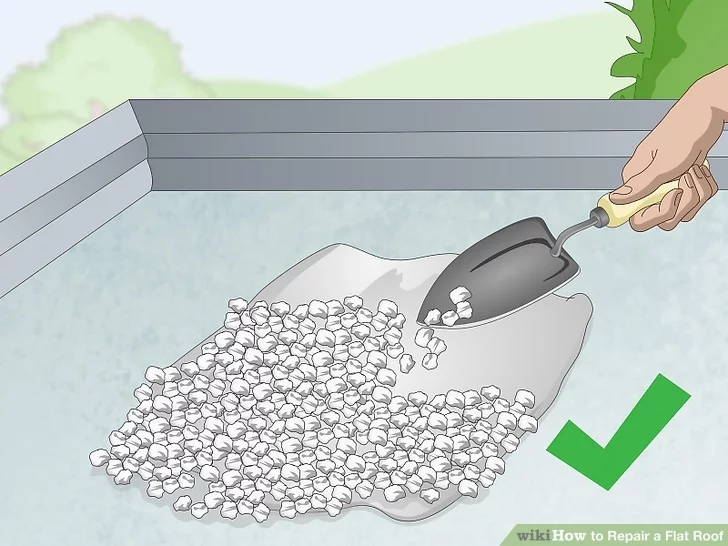
Layer Some Gravel
Sun damage is a potential complication with flat roofs, but it can be prevented with a layer of gravel. All you have to do is place the rocks evenly over the area to the point that the layers below are not visible. You might also consider adding them across the entire room if they are not already.
While it might seem like an odd step to take, covering a flat roof with gravel stops the sun from breaking down the bonds in the material, meaning a longer-lasting roof. Of course, you can also use a reflective coating.
Using Roof Patches
Roof patches are another great tool you can use to repair a flat roof. In fact, they come in kits that make things even easier. Once you have a kit, you will cut the damaged area, fill the hole with cement, apply a patch, cover it with cement, cut another patch to size, and add a final layer of cement on top of it to finish things off.
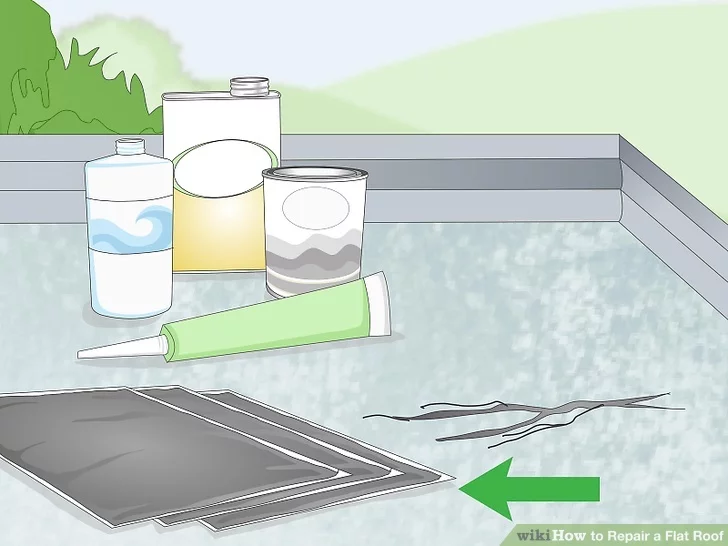
Get a Repair Kit
Roof repair kits will have everything you need to get the job done, with many including caulk for small areas and patches for larger areas. If you are looking for a simple way to get started, repair kits are the way to go. Just make sure you get patches that work for the type of roof you have. Examples include:
- SBS – Asphalt with a rubber-like consistency. Torch the patch during the repair.
- EPDM – Synthetic rubber that requires an EPDM patch for repairs.
- TPO – White rubber coating that requires a TPO patch for repairs.
Once you have the right type of kit, you can begin the repairs, which follow a similar pattern to the previous instructions to seal small cracks and holes.
Cut Out the Damaged Area
Using a utility knife, cut away the damaged area, starting at about an inch deep before slowly going deeper until you have removed all of the damaged material. You will want to cut a rectangle around the damaged part. Also, just like before, be careful not to damage the material beneath the damaged portions.
Fill the Hole
First, get a can of roofing cement that will work with the material of your roof, then fill the hole you cut with the cement. You want a layer around 1/8 of an inch in thickness, which you will smooth out with a trowel until it is level. Make sure to spread it beyond the damaged area by a minimum of two inches.
Also, do not try to use caulk if you plan on applying patches, as it is not meant to be an adhesive. That means that the repair will not last as long as it would with cement.
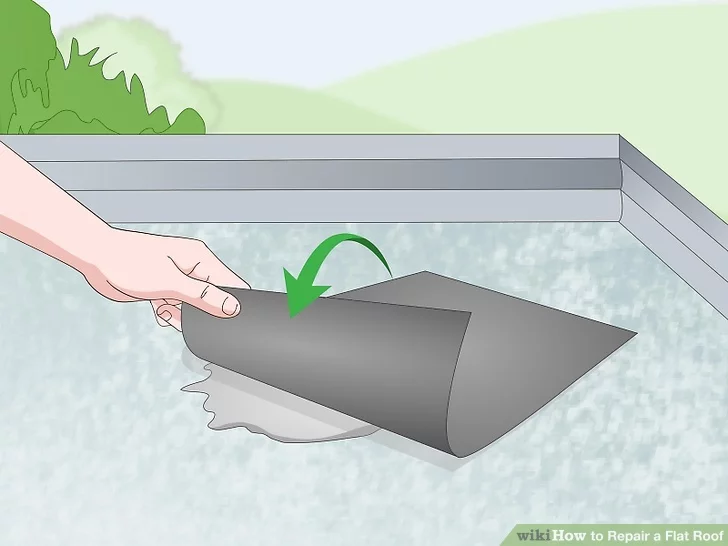
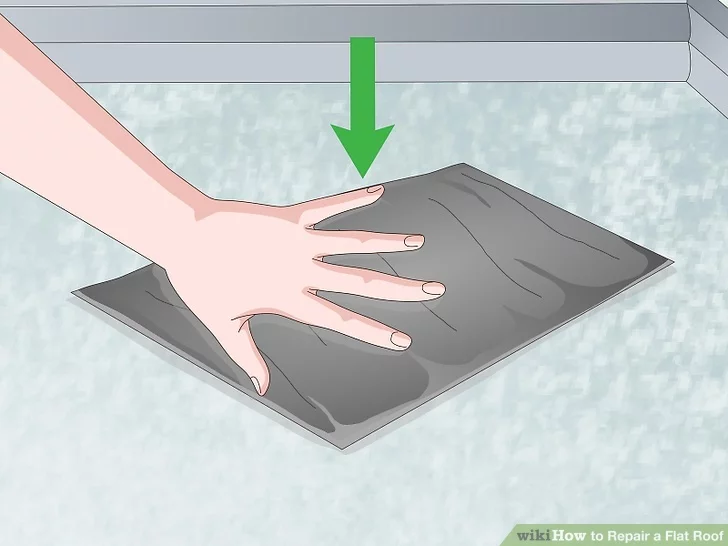
Apply a Patch
With the cement in place, place a patch over it. The patch should be the same material as the roof, and while it does not need to be cut to size, you can use a utility knife to do so if you wish. After it is in place and even with the rest of the roof, push it down into the cement until it sticks.
If you have a patch with an adhesive backing, you will not need to hold it in place to make it stick, though you still can for added security.

Cover the Patch Using Cement
Apply another layer of cement over the damaged area, spreading it to give the new patch a sticking point. It should be 1/8 of an inch thick and spread six inches beyond the damaged area. It should be level with the rest of the roof and spread further than the previous layer.
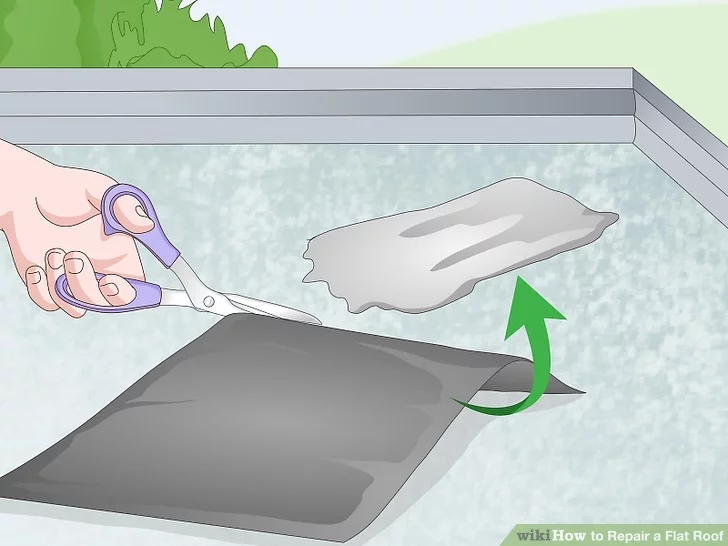
Cut a Patch to Fit the Cement
Double patching will add water resistance. Therefore, cut a patch to size, making it six inches longer and wider than the damaged area, equaling the cement layer you added in the last step. Be precise, using a tape measure and utility knife to get it right. The additional layer will make the spot more obvious, but it is worth it for the added strength.
Set the New Patch
Once again, place the new patch atop the damaged area, pressing it into the cement until it holds. It might be a bit larger than the existing roofing material, but you want it to be as level as possible. In fact, you want to spend extra time to make sure it is secure to the old roofing material to prevent water from getting underneath it. You might want to add more cement under the edges to weigh them down.
Lay Down a Final Layer of Cement
Finally, you will place a final layer of cement down, which should be level with the rest of the roof, as usual. You want the layer to be around half an inch thick and spread evenly with a trowel. Once the cement is down, clean the area and leave the patch alone. You might also consider adding gravel or using another method to prevent sun damage.
Resealing a Roof
There are times when a simple seal or patch will not be enough, such as when the waterproof seal needs to be replaced. In that case, you will want to reseal it, which means adding a primer, rolling out mesh, painting the sealant, and adding a reflective coat to finish things off. Though, one coat of sealant will not be enough.
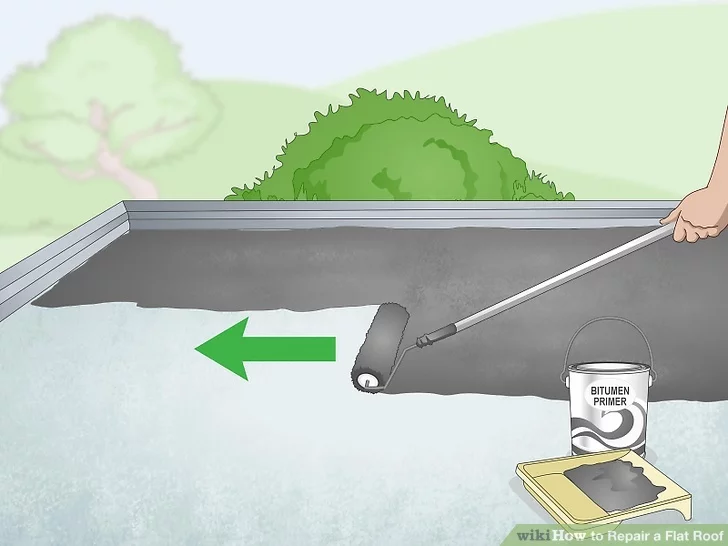
Apply a Bitumen Primer and Let It Dry
Before anything else, make sure to clean the roof. Only then can you pour some of your bitumen primer out, which you will then spread with a paint roller. By the end, you want a thin layer of about half an inch in thickness across the entire roof. Just keep in mind that you only need to use a small amount of primer, around a gallon per 100 square feet.
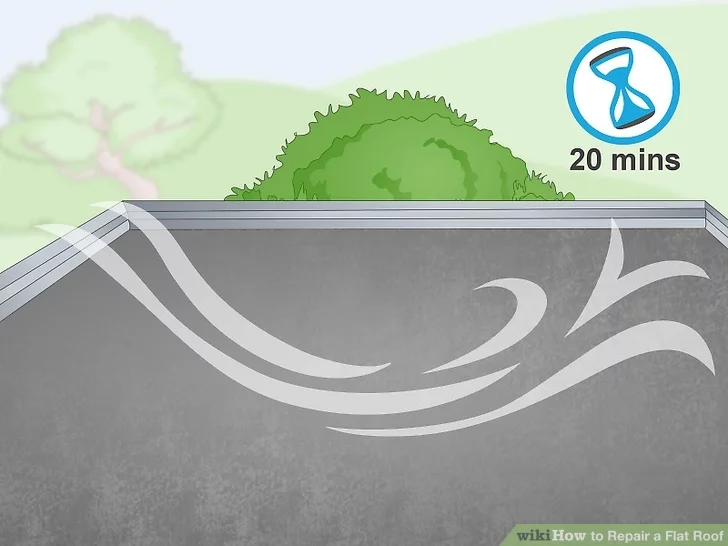
After application, let the primer dry for a minimum of 20 minutes. The exact time will depend on factors such as temperature and cloud coverage, but that should be covered in the manufacturer’s instructions. It is ready when it is dry to the touch. If you try to add sealant before then, it will not secure your roof properly.
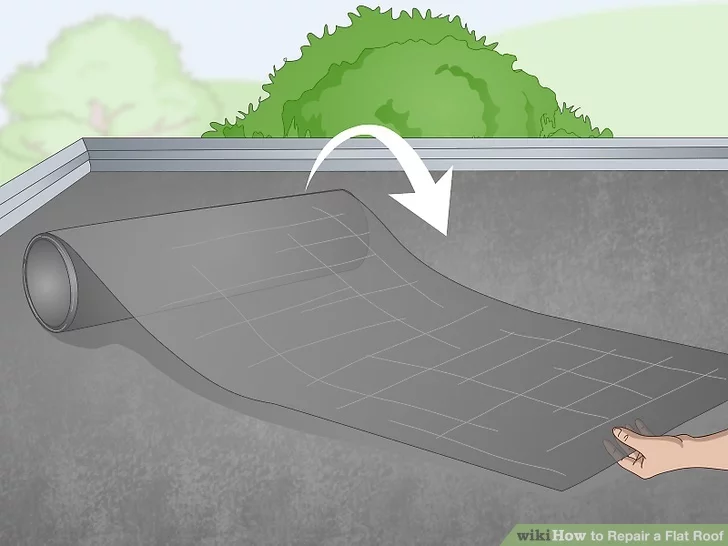
Roll Out Fiberglass Mesh
Fiberglass mesh comes in large rolls, which you will be rolling across the roof. At this point, you do not have to cover the entire roof since it is better to work bit by bit. Instead, roll the mesh out along the roof’s width from one end to the other, cutting it precisely so that it fits the edge. You should also ensure that it is level with the other parts of the roof.
When buying mesh, you will not need the giant rolls unless you are a professional or dealing with a massive roof. If anything, you want to avoid them since they cannot be lifted onto the roof easily. Instead, go with a roll around 40 inches wide, though the size can be adjusted for convenience.
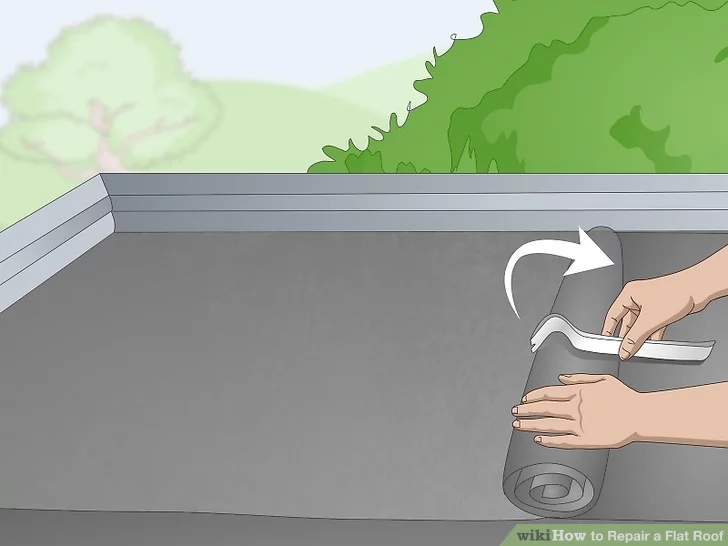
Curl the Mesh Ends Back
Once you have the mesh rolled out and cut, you want to start curling it back, bringing it to the center of the roof. You do this to seal the roof and mesh into place, which requires you to roll it back and hold it down to prevent unfurling. Try using a heavy object like a book or crowbar, avoiding sharp objects.
During the sealing process, you will work on one side of the mesh (curled) and then on the other. To avoid mishaps or difficulties, start with the more troublesome side, which is likely to be the side opposite your ladder or however you accessed the roof.
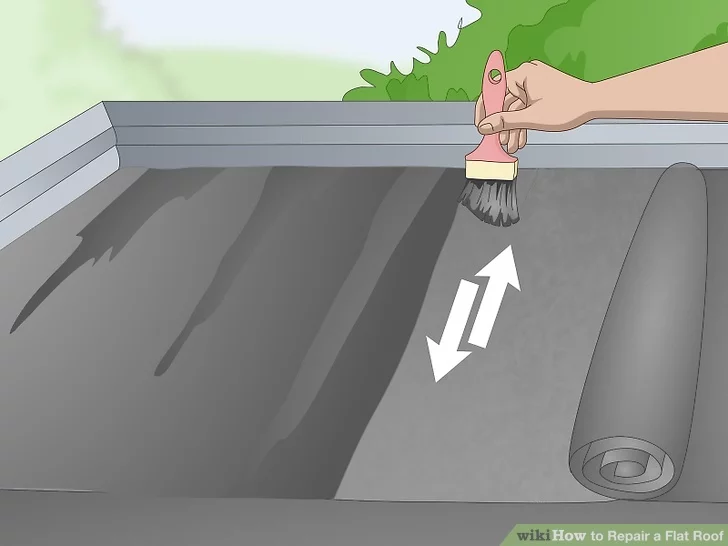
Mix Bitumen Roof Sealant and Paint the Roof
Before you can do anything else, you have to mix the sealant. It comes in a large can with the solid material on the bottom, so you have to stir it with a wooden mixing stick until it reaches an even, semi-liquid consistency. Doing this makes it easy to spread.
With the sealant ready to go, you can start painting it onto the roof, which is best done with a soft-bristle brush. Dip the brush into the sealant and spread it at the far end of the roof, working your way back toward the curled mesh. You only want to cover the area the mesh will cover once unfurled, leaving an even layer about half an inch thick.
When you are done, do the same under the other end of the mesh, which you can roll up if you have not done so already.
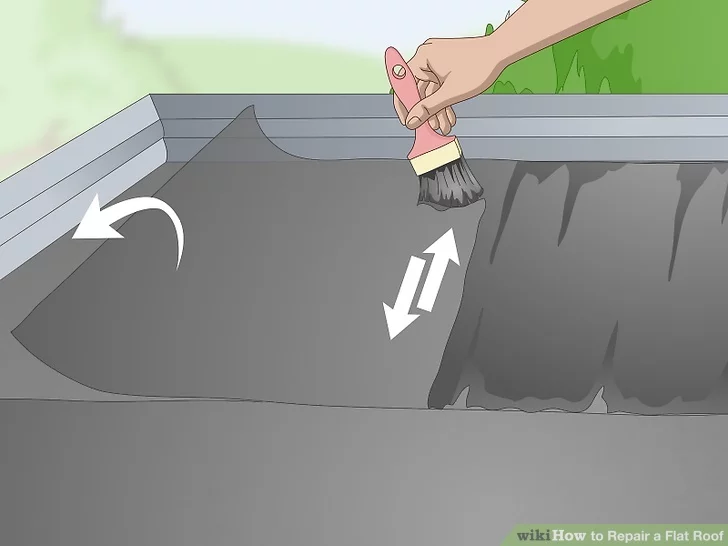
Coat the Mesh With Sealant
With the sealant spread on the roof, you can unfurl the mesh and press it flat against the roof using your feet. Then, brush another layer of sealant on top of the mesh, coating the entire thing in another half an inch of sealant. The additional coat keeps out moisture and keeps the mesh in place.

Cover the Entire Roof In Mesh
With one piece of mesh properly installed, you can move on to the next piece beside the one you just finished. Have them overlap by around two inches and keep each piece level with the others. Then, all you have to do is repeat the above steps until your entire roof is covered in mesh. The amount of mesh and sealant involved depends on your roof.
Add Another Coat of Sealant In 12 Hours
Wait for 12 hours to allow the sealant to dry, then take a look at the results. You will likely see dark holes that signify a lack of waterproofing. Apply another coat of around half an inch in thickness over the entire roof to fill in the small holes, giving it plenty of time to dry afterward. Then, do a final check to ensure the entire roof is properly sealed.
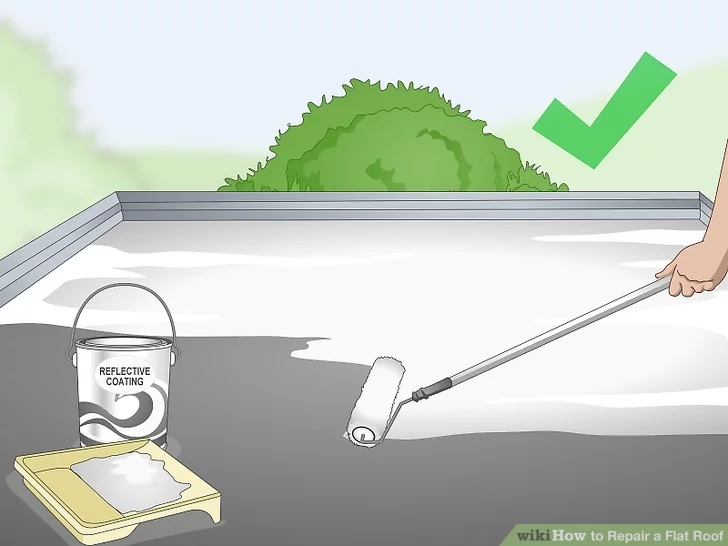
Finish With a Reflective Coat
The last thing you want to do is apply a reflective coat over the resealed roof to protect it. Buy some coating, mix it to an even consistency, and start applying it to the roof. It is best to use a brush to get the edges before finishing with a roller to spread the coating over the rest of the roof.
The key is to apply a smooth, even layer over the entirety of the roof, ensuring the entire surface has protection against the sun. Just keep in mind that it might take anywhere between 8 and 24 hours to dry, depending on the weather.

With over 12 years of construction industry experience, David Bitan specializes in restoring, inspecting, maintaining, and repairing roofs for residential, industrial, and commercial properties.
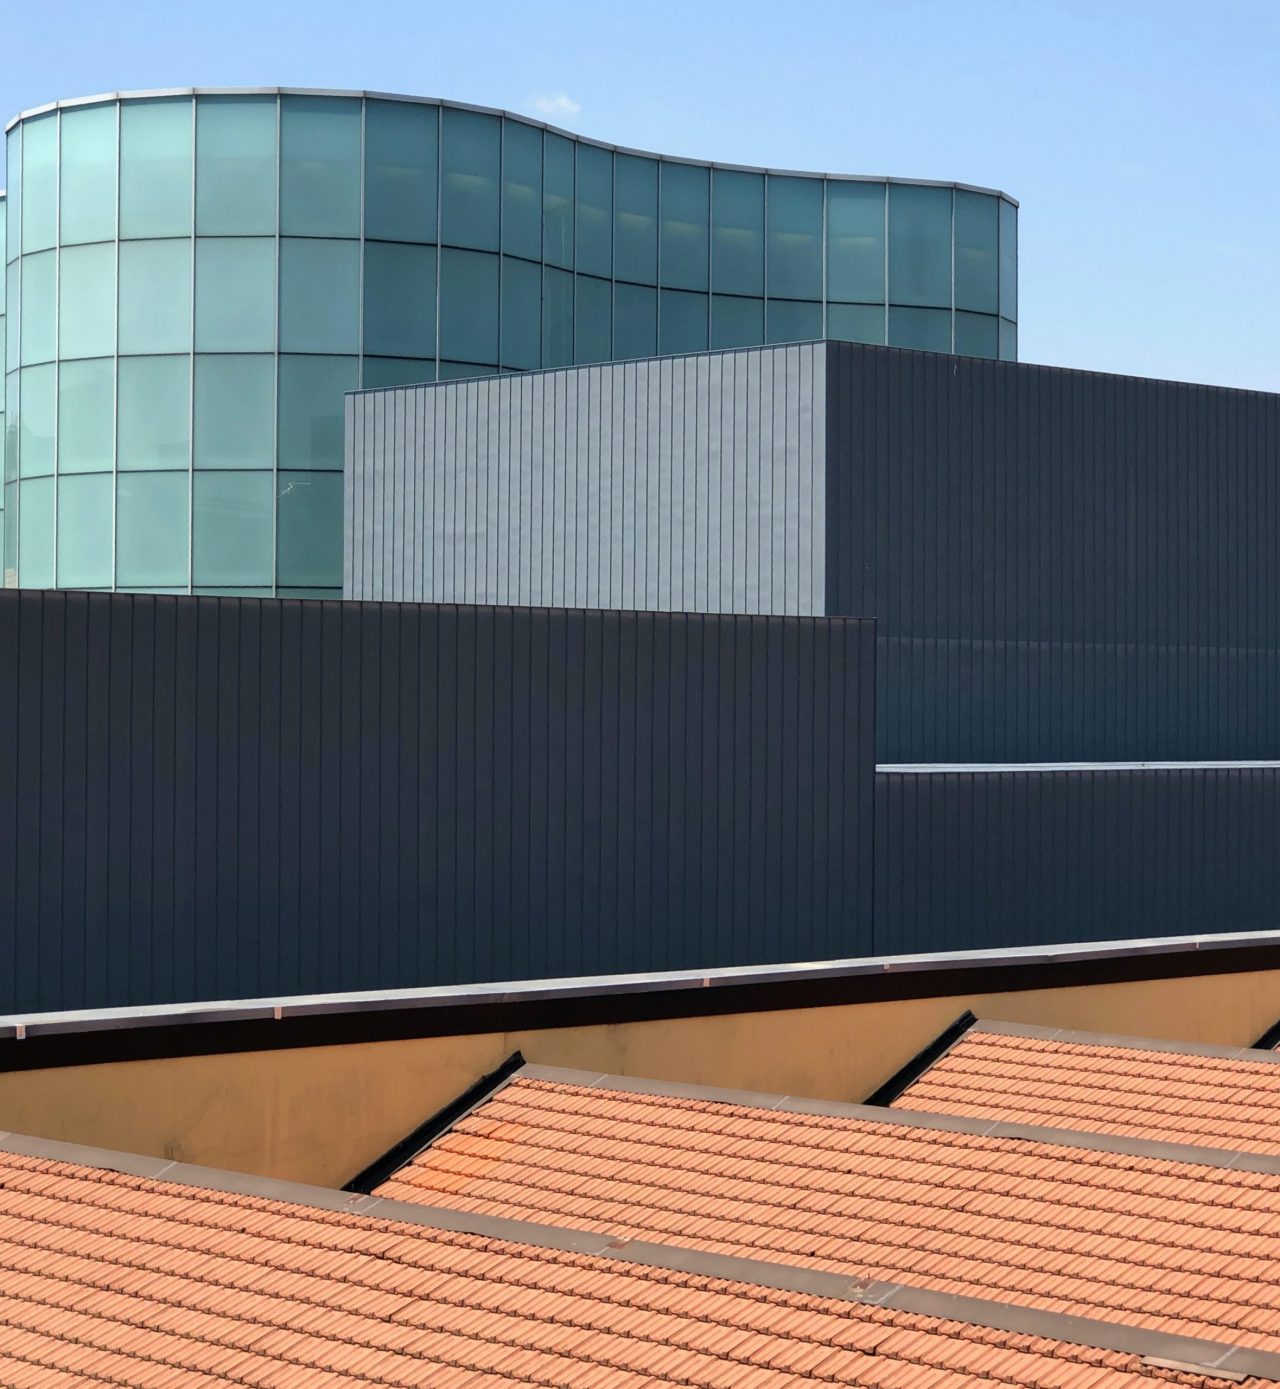
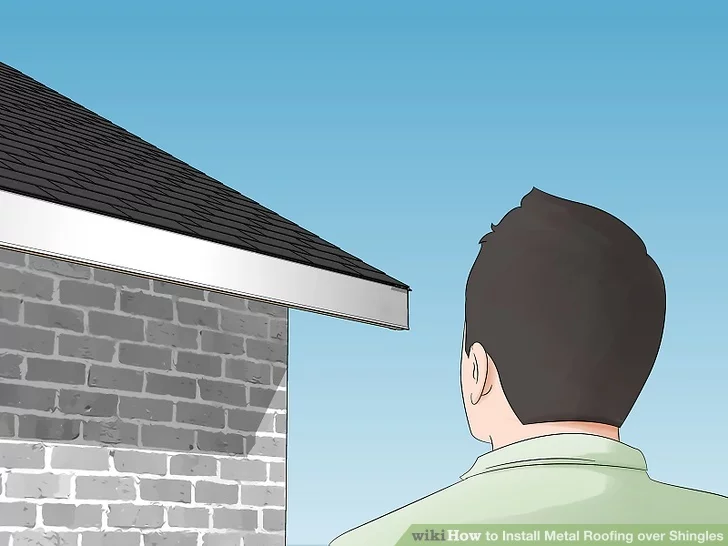
How to Install Metal Roofing Over Shingles
If you begin to have problems with your shingles or they are showing wear and tear, replacing them with other shingles is not your only option. Instead, you can consider installing a metal roof, metal roofing over shingles, which is known for its durability, environmental friendliness, and sleek appearance.
Additionally, you can usually just install metal roofing over shingles. The only things you need to consider are whether the roofing is in decent condition and not overly heavy. Of course, this is usually not something you can do alone, but it might be fine on smaller projects or with others. Check with your local roofing contractor to see if you need a roof replacement.
License: Creative Commons
The Best Way to Install
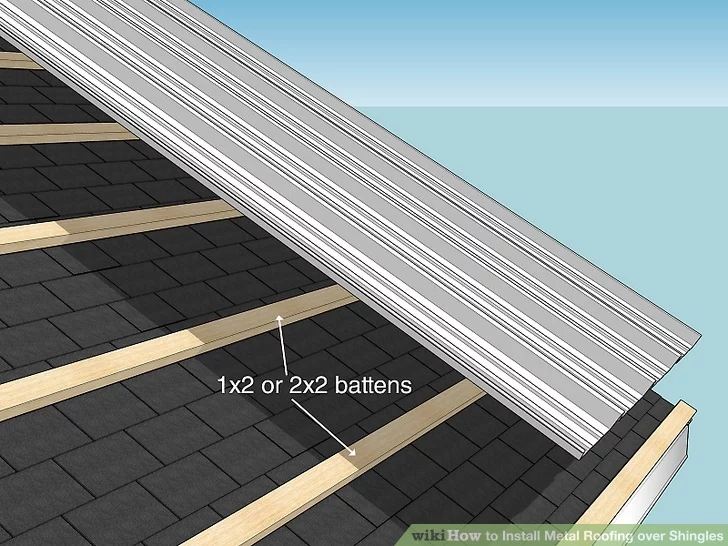
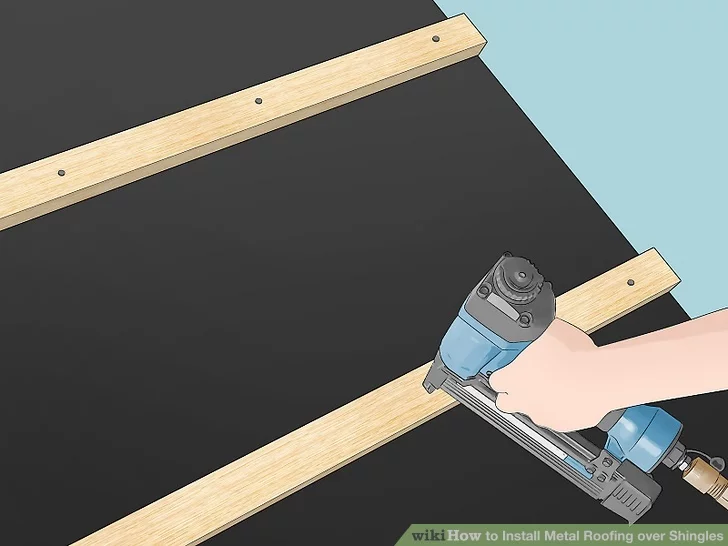
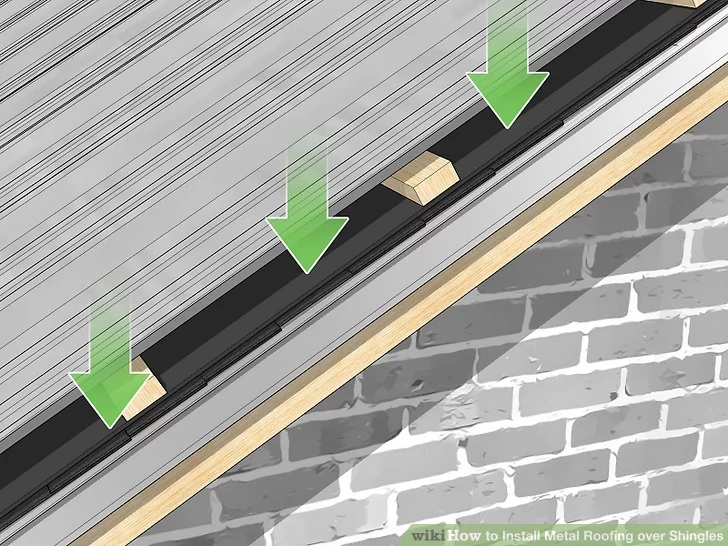
If you want to install metal roofing on top of a shingle roof, the best way is to use battens. Battens are strips of wood (though they can be other materials) that help you maintain a gap between the shingles and the metal roofing.
Take your battens, which should be 1×2 or 2×2 boards, and place them on top of the shingles. They should be placed horizontally and parallel. Doing this allows the roofing to contract and expand with the weather and ensures that there is no major build-up of moisture between the layers.

License: Creative Commons
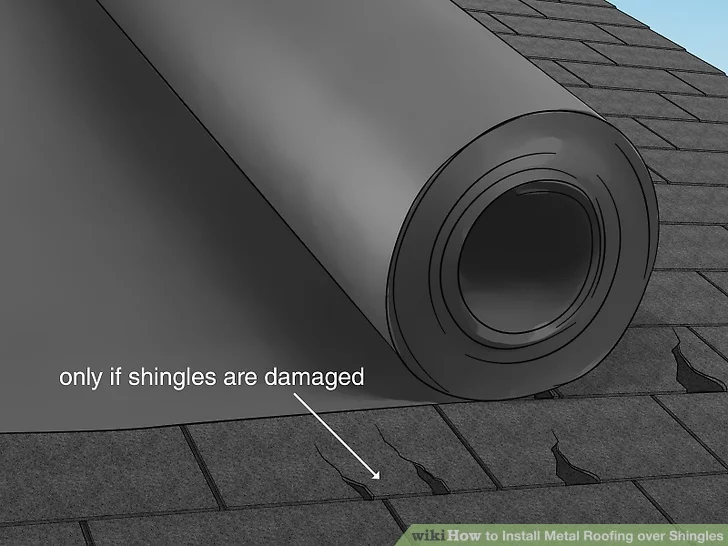
The Deal With Damaged Shingles
While using battens is great, you cannot ignore damaged shingles. If they are leaking or not in good condition, you will need to remove them first. While many people installing a metal roof on top of a shingle roof because it needs to be replaced, they need to be stripped.
In part, damaged shingles need to be replaced because adding weight on top of them will eventually cause them to collapse. Moreover, damaged shingles might have an underlying problem or damage underneath, so keeping them on is not an option, no matter what. Check with your local roofing contractor to see if you need a roof replacement.
Therefore, you will need to have them stripped, and any joists showing damage or decay will need to be replaced. After that, the metal roofing, and metal roofing over shingles can be placed onto the framing. If you need additional help, call a roofing contractor.
License: Creative Commons
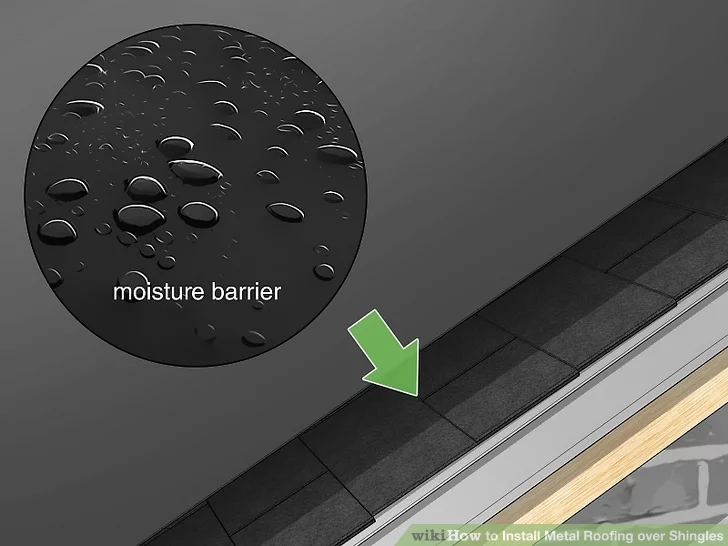
The Role of Underlayment
Underlayment is often used, but it is not mandatory, especially if the shingles are in decent condition. If it is added, putting it down before the battens and roofing is a good choice. Doing this helps with unwanted moisture and the prevention of leakage. Moreover, it is an inexpensive way to add a barrier of protection, even if it is not a must.
License: Creative Commons
Keep in mind that you might see something different done by roofing contractors. Some place plywood on the battens before nailing the felt on top of that. Then, installing a metal roof can go down atop the other layers, like metal roofing over shingles. However, doing it this way means adding quite a bit of weight, so it is not always used.
License: Creative Commons
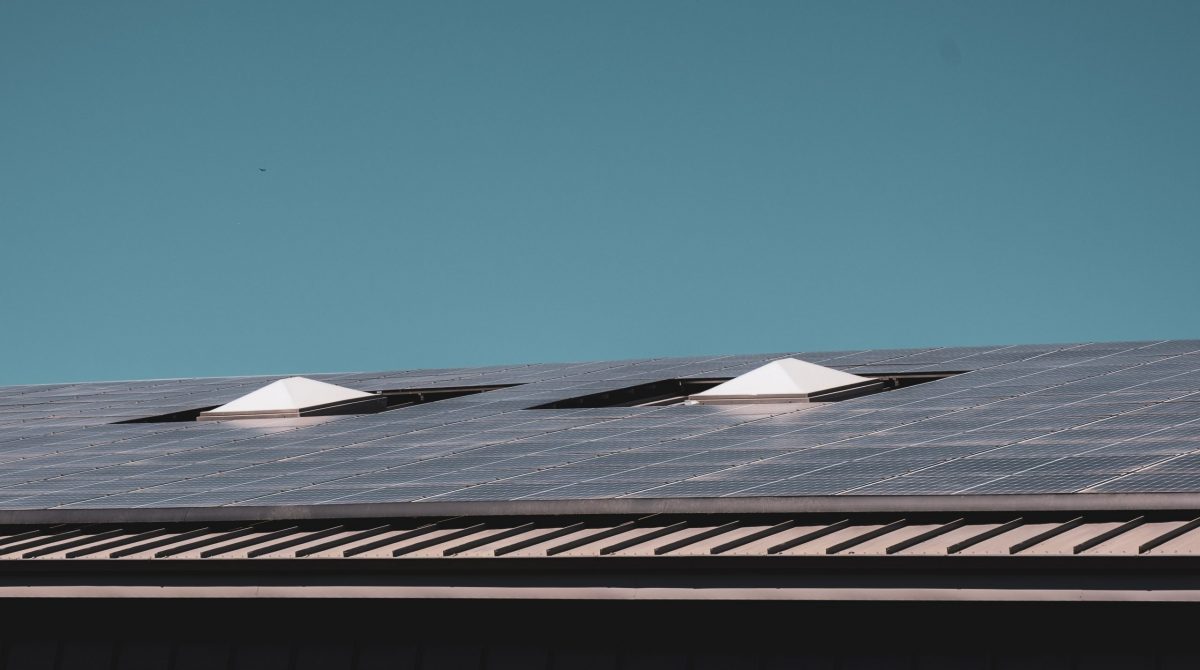
Installing Metal Roofing Over Shingles
While the process is not complicated and was discussed a bit above, it is important to go step by step when installing a metal roof over shingles. To start, you will be getting the battens and underlayment (optional) in place, followed by securing the panels to them. Finally, you will add closure strips and flashing to complete the job.
Battens and Underlayment
Assuming the shingle roof is in good condition, you can immediately place the underlayment down, unrolling the felt over the roof. Remember that underlayment is optional, though it is a good choice for extra protection. Once the underlayment is where you want it, nail it into the plywood layer beneath the shingle roof.
License: Creative Commons
After the underlayment is nailed down, place the battens atop it in rows. Remember to place them horizontally and parallel to one another as you nail them in place. Getting the battens right is the only vital part of this, so do it carefully. And remember, if the shingles are damaged, they will need to be removed before the battens go down.
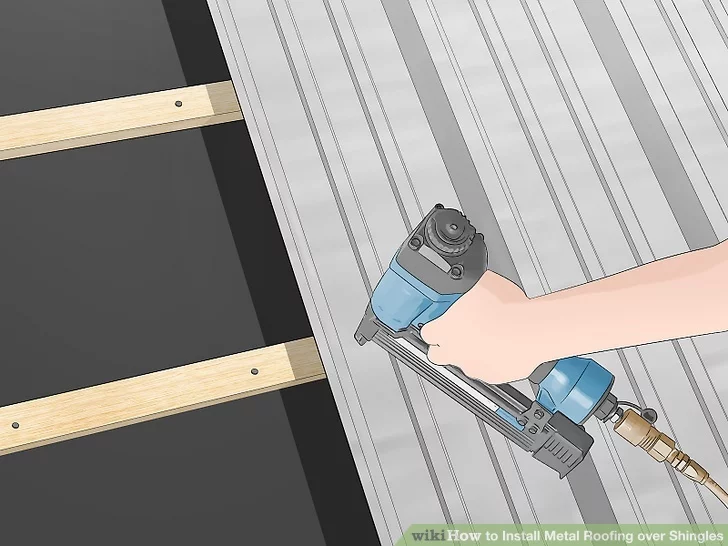
Secure the Metal Sheets
It is not easy to secure the metal sheets alone, especially since you have to haul them onto the roof and screw them into place. Therefore, you might want to get help or have roofing contractor deal with securing them onto the battens or subroof. The sheets are heavy and hard to maneuver, so do not get frustrated if they do not line up immediately.
When laying down the panels, the grooves must be exactly level when placed beside one another. If they are not, they will need to be cut in such a way that the seams match.
License: Creative Commons
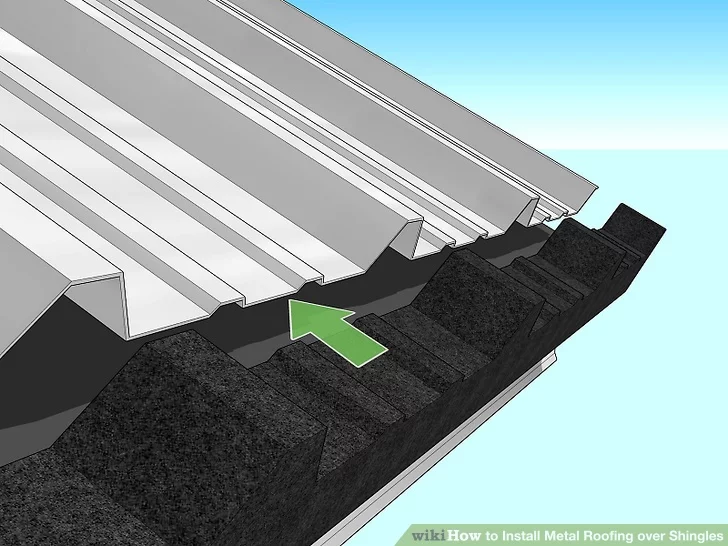
Closure Strips and Flashing
With all of the metal sheets in place, you want to go to each seam where two sheets touch and add closure strips to keep water out. Next comes flashing, which means a drip edge on the edges of the roof. It also means a ridge cap at the peak. Make sure to screw the flashing into the battens or edgings to ensure it is firmly in place.
The last thing you want to do is apply a rubber grommet atop each screw or nail to avoid leaking through the minuscule gaps. Check with your local roofing contractor to see if you need a roof replacement.
License: Creative Commons
Doing the Work Yourself
Now that you know what is involved in the process of installing a metal roof, you might be thinking it is an easy project you can take on yourself. However, without previous experience, it is not a great idea. Roofing can be dangerous, especially alone, and metal roofing is particularly risky. It is heavy, requires special equipment, and doing it incorrectly can cause a disaster. Check with your local roofing contractor to inspect your new roof.
However, if you have experience, you can give it a shot. Just keep in mind that it will cost between $15,000 and $60,000, which will depend on the material and how much space you need to cover. Though, the good news is that metal roofing can last upward of 50 years.
The only exception to the experience recommendation is if you are working on a particularly small project. That includes something like a shed, where there is not much lifting and falls are unlikely.
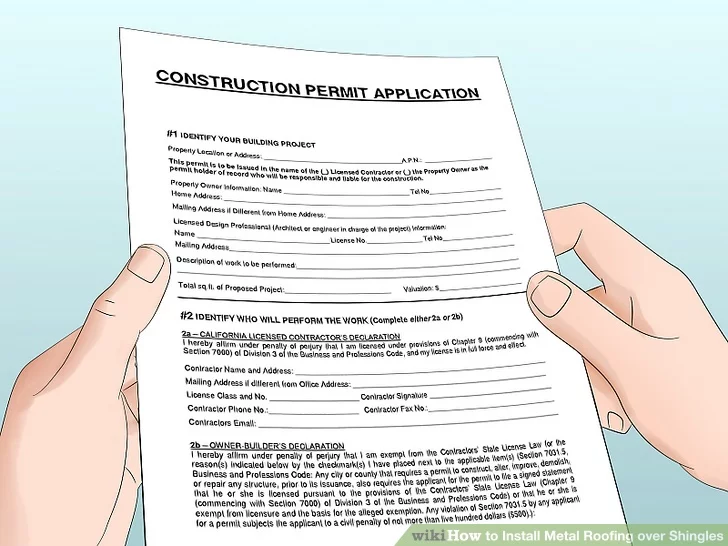
Do Not Forget a Permit
If you do the work yourself, you will probably need a permit since it is illegal to install such roofing without one in most places. That might not be true of small things, like minor repairs, but for big roofing jobs, like installing a metal roof, you will want to contact your local building department. Check with your local roofing contractor to see if you need a replacement.
License: Creative Commons
Additionally, some places do not allow those without a contractor’s license to do their own roofing work. Therefore, even if you decide to go with a professional, ensure they are licensed to do the work.
License: Creative Commons
The Disadvantages
Metal roofing comes with many benefits, but there are also some disadvantages. One disadvantage is that there is an added weight that can be a problem over time. Homes are designed to handle a single roof. Moreover, as time passes, degradation can occur in the joists, subroof, and shingles.
Ordinarily, the weight is not a problem since metal roofing is usually lightweight, which means a single layer of shingles will not lead to buckling or damage. But that is not always the case, especially with old homes, which carry the possibility of already having old shingles underneath the current layer. Make sure and check with a professional before installing metal roofing over shingles.

License: Creative Commons
Installing a metal roof also tends to be expensive. It comes with increased durability and a higher effective lifetime, but it does mean eating the initial cost. Some cheaper options include aluminum and galvanized steel, and for small projects, corrugated steel is the least expensive option.
Finally, you will likely notice some noise when it rains. The shingle layer helps to reduce that noise, so it should not be significant when you are inside, but there will still be some sound.
With over 12 years of construction industry experience, David Bitan specializes in restoring, inspecting, maintaining, and repairing roofs for residential, industrial, and commercial properties.
How to Install a Roof Vent
Poor ventilation can lead to a lot of problems, including the growth of mold and mildew. Roof vents help with that, allowing moisture to leave a house and lowering the risk of such problems. There are also quite a few effective vents, with some of the ones you might commonly see including soffits and static exhaust vents. There are also ridge vents, which go all the way across the roof.
Perhaps the best part is that the installation of vents is an easy project you can easily do yourself with the right tools. If it sounds like a project you want to give a shot, check out the article below, where you will find sections on each of the three vent types mentioned above.
License: Creative Commons
Soffit Intake Vents
These roof vents are a great choice to prevent ice dams, cool attic space, and help with air circulation. Often, they are installed beneath the eaves of a Simi Valley roof, and they are not terribly difficult to install. The process involves checking for wiring, outlining the area, drilling holes, cutting out the rectangle, and installing the vent.
License: Creative Commons
Check for Wiring
The presence of wiring means you will need to find a new place for your soffit vents, so make sure there is nothing that could get in the way of your work. That involves moving away insulation to check from within the attic. Assuming there is nothing to get in your way as you work from outside, you are good to go.
One thing you should do to avoid a misstep is drill a hole from inside the attic. Put it directly in the center of the area you want to put the vent, allowing it to serve as a visual marker for where to start sawing later.
License: Creative Commons
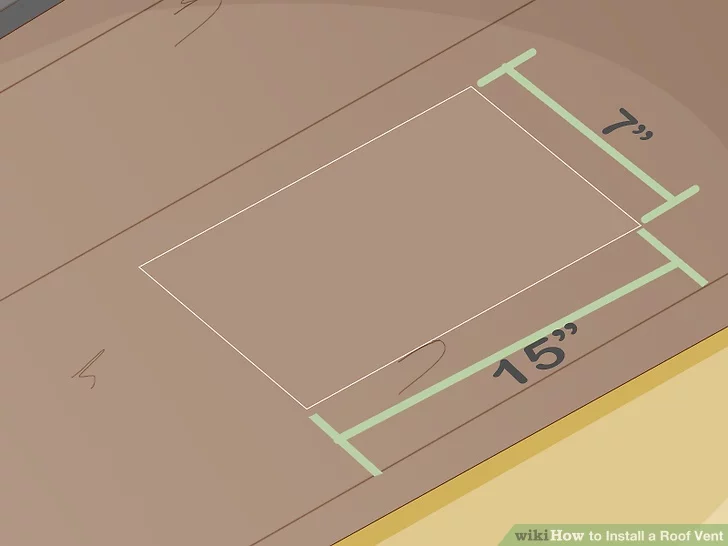
Outline the Area
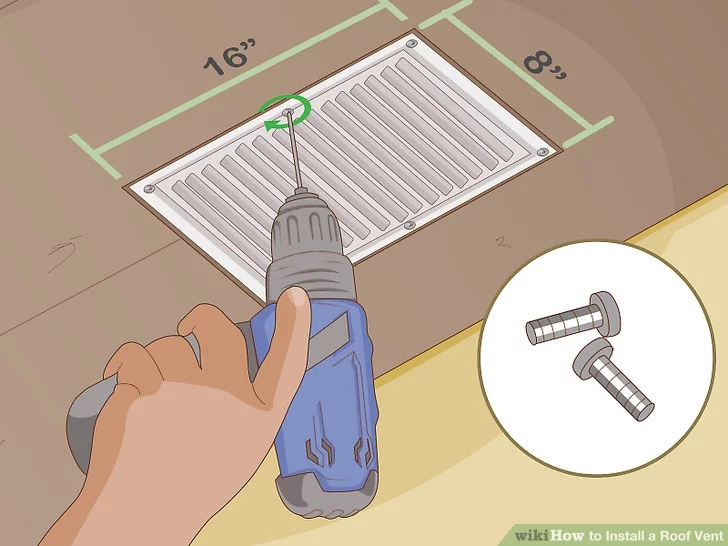
At this point, you should have a decent idea where you want to put your soffit vents. Now, you need to outline an area for each one that is approximately 7 inches by 15 inches. When doing this, pay attention to nail lines and seams in the paint, which can show the location of the rafters in the attic.
A soffit vent is installed below an overhang, so you want to use a straightedge and writing implement to draw a rectangle where you plan to put the vent. An easier way than drawing each outline by hand is creating a template with cardboard or another lightweight material and tracing it for straight lines and correct dimensions.
Additionally, keep in mind the size of the vents you plan on installing, as that might change the size of the outline you need to draw.
License: Creative Commons
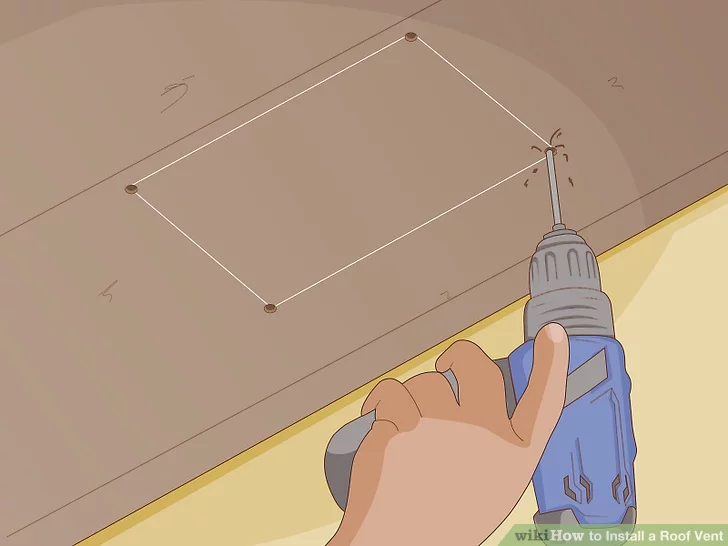
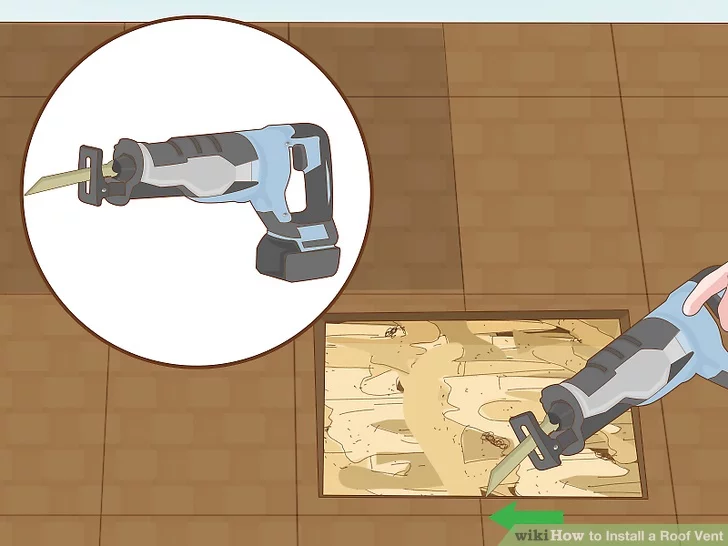
Drill Holes and Cut
Start by getting a drill bit large enough to loosely fit the saw blade you are using inside the holes you place. Then, drill a hole at each of the corners, which will make things easier on the saw when you get to drilling.
During the drilling and sawing, you need to make sure you take safety into consideration. Ensure the ladder is steady, there will be no problem with any cords, and that you are wearing safety glasses to prevent sawdust from irritating your eyes.
License: Creative Commons
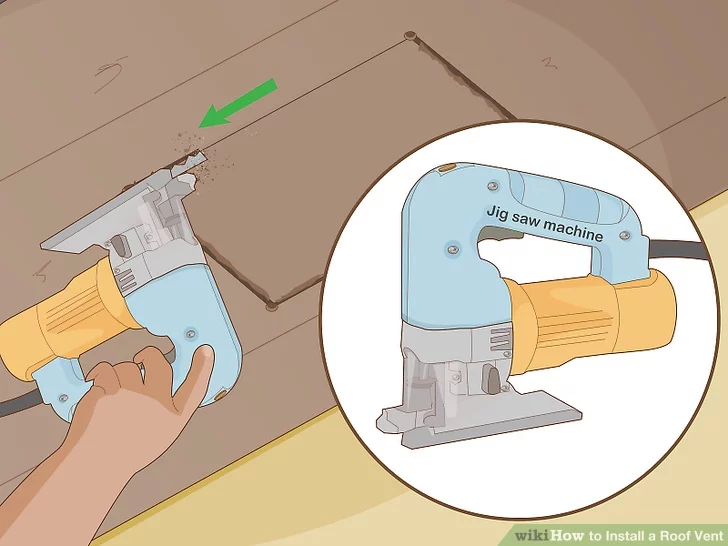
After drilling the holes, grab your jigsaw and start cutting out a rectangle, following the outline you drew previously. You want to start by placing the blade into a hole at one of the corners. From there, it is just medium speed from one hole to the next until the job is done, adjusting the blade using the holes.
It is also a good idea not to drill from directly beneath the area. That could cause the wood to hit you once you finish the cut.
Place the Vent Cover
Assuming you followed the above directions, you want to use a 8-inch by 16-inch cover over the hole. Using wood screws is the best choice to secure it, starting with the corner screws. Most vents have four or six screw holes, so after the corners, you might have a few more to add.
License: Creative Commons
Sometimes, screwing in a soffit vent can be awkward. The safest and easiest way to get it done is by using your dominant hand to work the drill with a screwdriver bit. You can use your other hand to keep the vent steady until you get a few screws in place.
Place Additional Soffit Vents
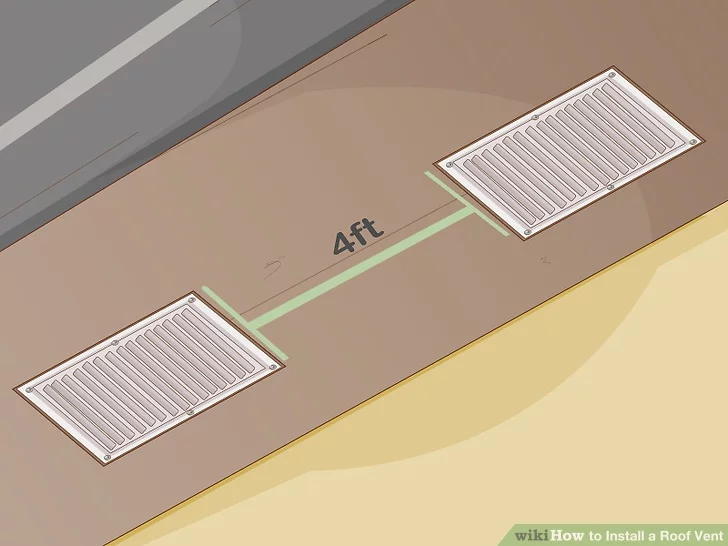
A single soffit vent is not enough to do things properly. Instead, you want to put one in every four feet or so, using as many as you need. Just start with one and use it to measure out the distance to the edge of the next, then use your template.
The rule of thumb is a single square foot of ventilation per 300 square feet in a house. You also want about half and half for intake and exhaust vents. Lastly, a good tip to keep things from crawling through your vents is to add a layer of window screen in them.
License: Creative Commons
Static Exhaust Vents
Soffit vents are great as intake vents, but you want to balance intake and exhaust vents for proper circulation. That is where static exhaust vents come into play, allowing air to escape from the attic. The process involves marking the area for the vent, removing the shingles and cutting a hole, securing the vent, and adding shingles back to finish it up.
Mark the Location
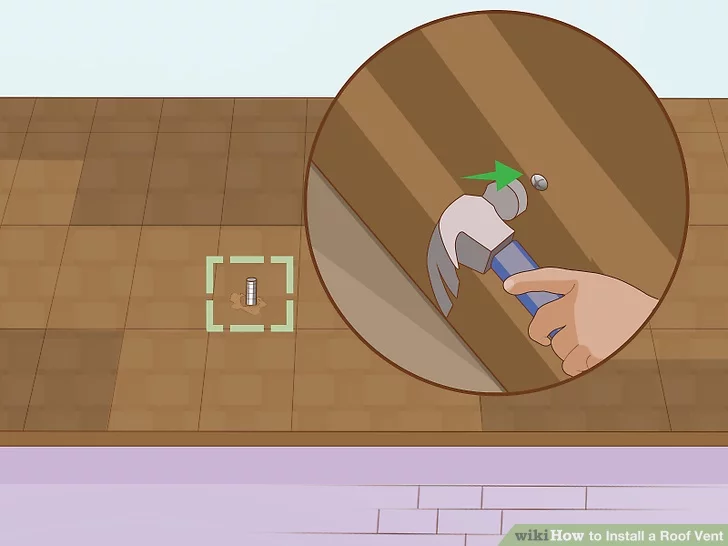
Once again, you want to mark the location for the vent ahead of time. In the case of a static exhaust vent, you can drive a nail through the attic. Doing this will either cause it to be visible on the outside or raise the shingle enough to be noticeable.
As for where to drive the nail through, pick a place two or more feet from the peak of the roof, ensuring it is between the rafters and leaves plenty of space for the vent. You can also perform this step with a drill if space is tight.
License: Creative Commons
Clear the Shingles and Cut a Hole
To proceed, you will need to get on the roof, meaning you will need a ladder. Once you are up there, find the nail and use a claw hammer to get rid of the shingles around it. You want to clear as many as necessary to fit the opening on the bottom of the vent, making enough room for it to go down.
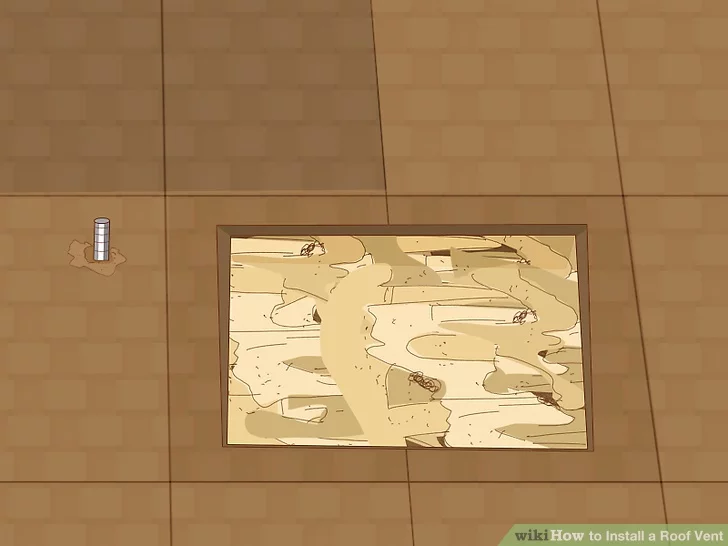
Alternatively, you can cut out shingles with a utility knife. You might also find it useful to draw an outline the same size as the vent, especially if you did not cut a precise amount. Of course, if you do not feel comfortable getting on the roof, professionals can get this type of work done quickly.
License: Creative Commons
If you decide to do it yourself, finish the outline and use a circular or reciprocating saw to cut a hole. Be careful to set the depth to only cut through the top of the roof without affecting what is below, such as the rafters. Cutting is simple if you follow the outline, and once you are done, you can discard the boards.
Another option, assuming you have a roofing cutting blade for your saw, is taking care of the shingles and roof at the same time. If done correctly, it makes putting in the vent easy. Just do not forget safety glasses, regardless of what method you choose.
License: Creative Commons
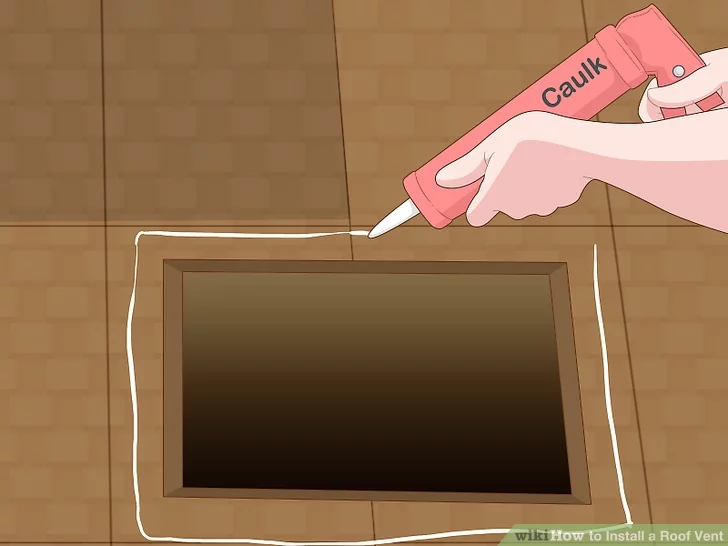
Caulk and Secure
Once the shingles and hole are in place, lay down caulk or tar, preferably using an easy applicator tube. Make sure the adhesive is even all the way around the edges, then place the vent and apply pressure until it sticks.

License: Creative Commons
The adhesive does a good job of keeping it in place, but it is not secure. To ensure things stay in place, you want to secure the vent with nails or screws. Some will even have holes to make this easier. Even if there are no holes, place the nails or screws every four or five inches.
License: Creative Commons
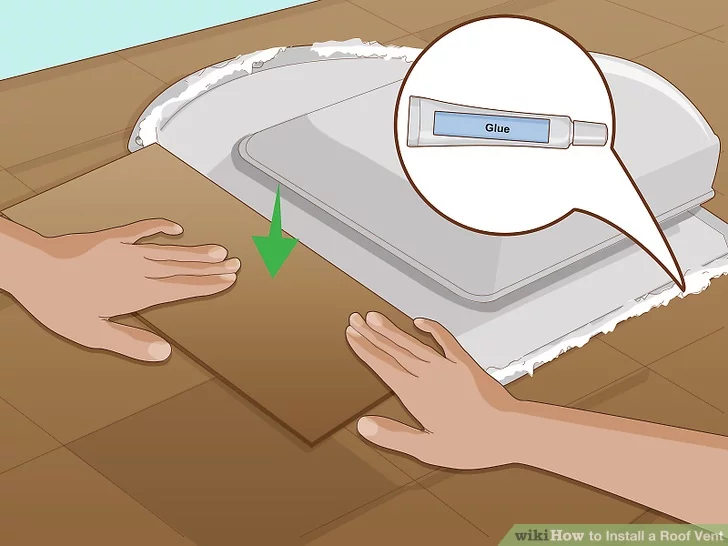
Glue Down Shingles
The final step is placing shingles over the bottom of the vent, which requires the use of adhesive. You can use tar or caulk, which you will apply atop the bottom flap. Apply pressure, then use a nail at the top of each of them to secure the shingles to the roof. By the end, the entire flap should be covered. If you are having trouble, cut the shingles to fit.
License: Creative Commons
Ridge Vents
Ridge vents are considered a very efficient choice, and they are an affordable one on top of that. In fact, many experts suggest ridge vents over other options. To install ridge vents, you will need to remove the ridge cap shingles, cut a slot, place the ridge vents, secure the vents, and replace the ridge cap shingles.
Remove the Ridge Cap Shingles
Step one is removing the ridge cap shingles, which are located at the peak of the roof and shaped like upside-down Vs. Once again, this requires you to get on top of the roof, where you will have to pry the shingles away from the roof with a claw ladder. But do not get rid of them since they will be used later.
License: Creative Commons
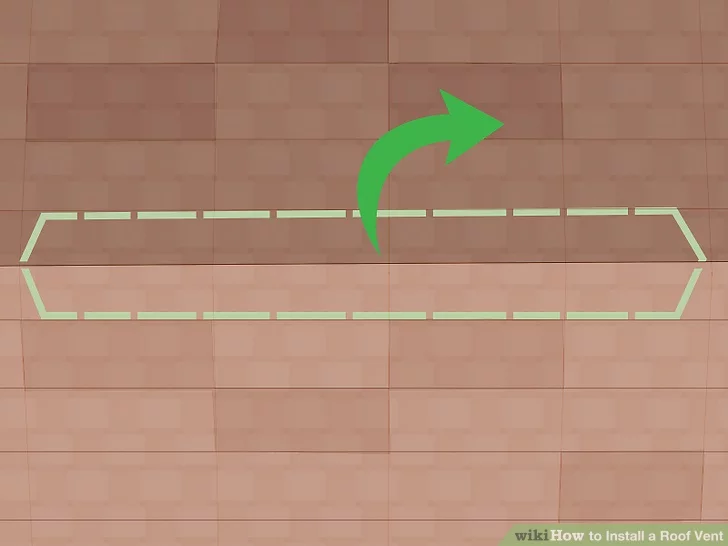
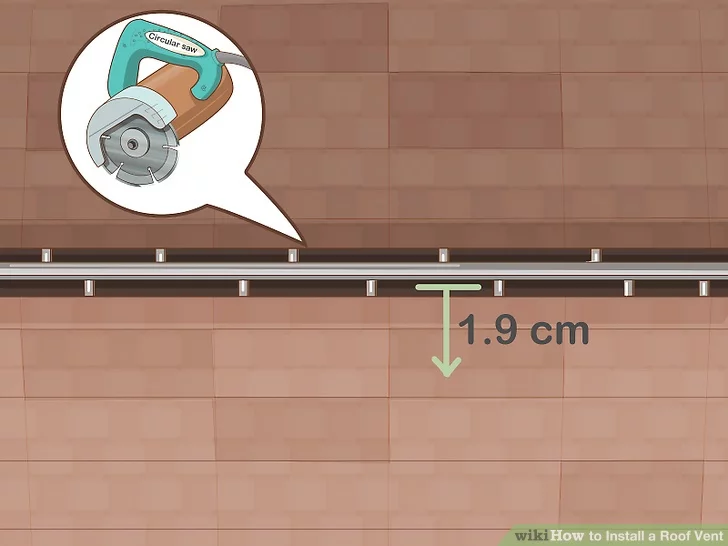
Cut a Slot at the Peak
With the peak exposed, the next step is cutting a slot around ¾ of an inch down from both sides of the peak. Use a circular saw to do this, pushing it to create a straight line from one end of the peak to the other. Just make sure to set the depth so that it only cuts the surface and not the rafters below.
While the above is a simple way to get your ridge vents done right, they can also be placed in sections instead of going all the way across the roof. The way you cut depends on what you want. No matter what, make sure to remove the debris when you are done.
License: Creative Commons
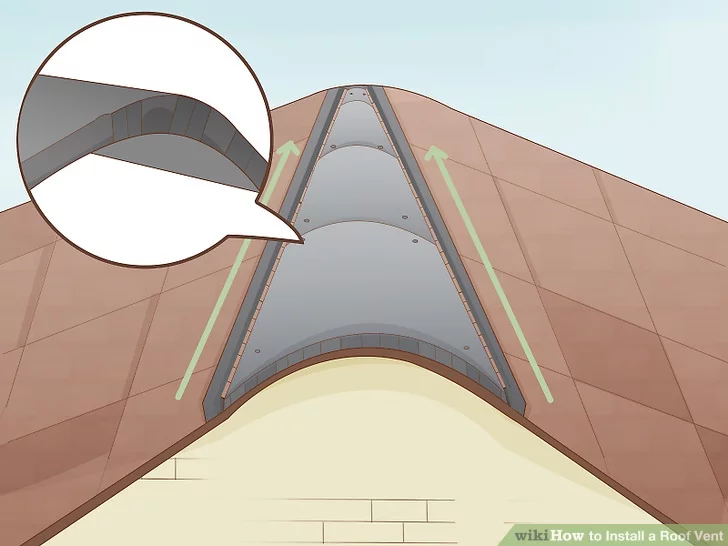
Place and Secure the Ridge Vents
The ridge vents go directly over the slot, covering every inch. They need to be centered on the peak, with the sides laying flat on the surface of the roof. If you need to cut the ridge vents at the end of the roof to make everything fit, use a utility knife and ensure it is flush.
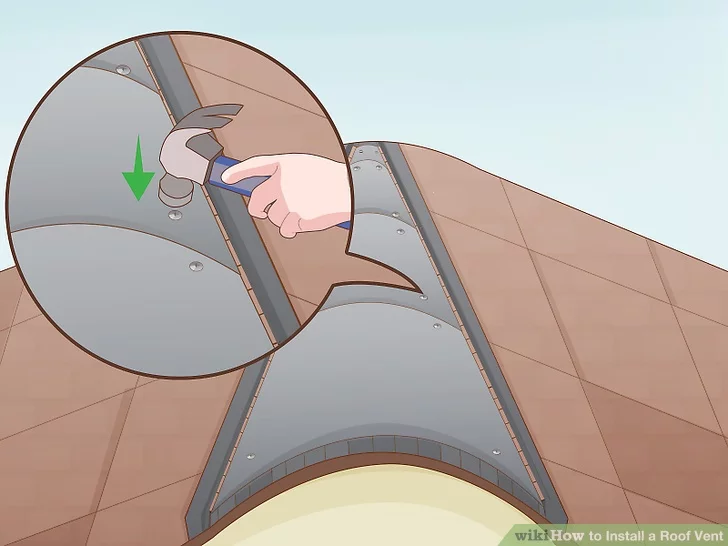
You will want to hold ridge vents in place until you have a chance to nail them down, which you will do by driving a nail through pre-drilled holes. Just make sure the nails are long enough to go through the vents and roof, securing the vents tightly against the surface of the roof.
License: Creative Commons
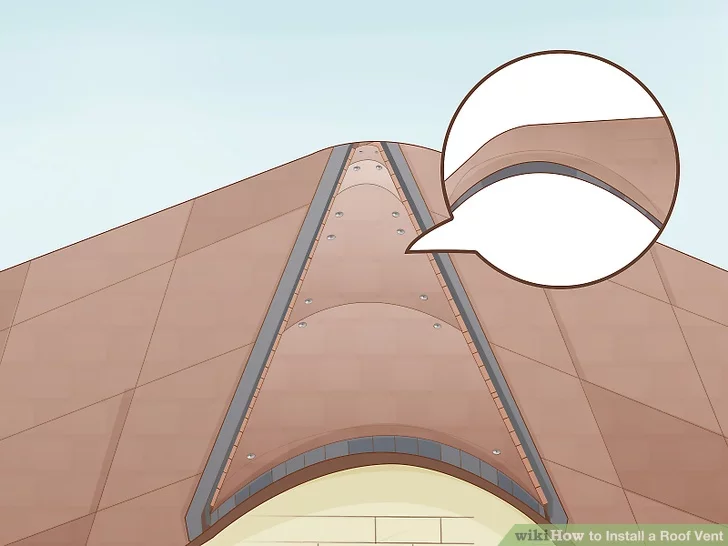
Replace the Ridge Cap Shingles
The last thing you need to do is replace the ridge cap shingles. That being said, it is more for aesthetics than anything else since it allows the ridge vents to blend with the rest of the roof.
License: Creative Commons
If you decide to do it, layer the shingles atop the vent and nail them down through the vent to secure them. You will want to ensure they go into the roof to prevent them from blowing away with bad weather.
With over 12 years of construction industry experience, David Bitan specializes in restoring, inspecting, maintaining, and repairing roofs for residential, industrial, and commercial properties.
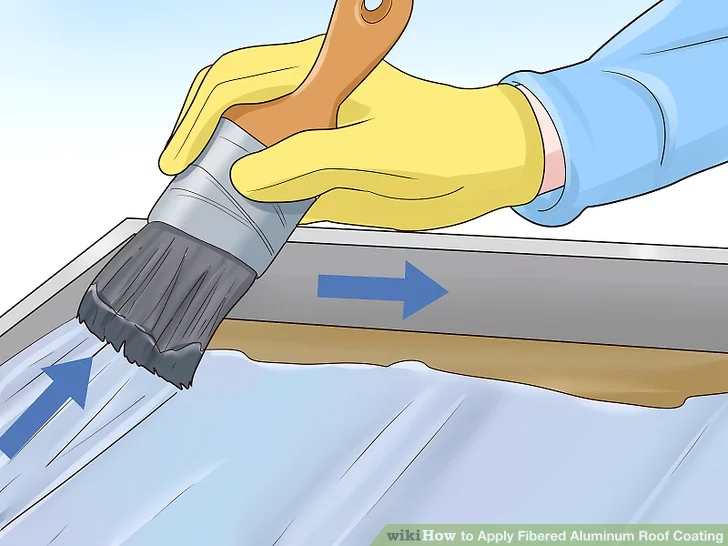
How to Apply Fibered Aluminum Roof Coating
Roofs are under the sun every day, which can eventually cause damage. That is especially true if your Thousand Oaks roof is vulnerable to overheating. Using an aluminum roof coating is one of the ways to prevent that, and it is particularly useful if you have a flat asphalt or rolled roof.
Aluminum roof coating works by reflecting the direct sunlight pouring down on the roof instead of absorbing it. By doing that, the coating protects your roof from damage and can even reduce the energy bill in the summer months by lowering the need for AC. The best part is that even though the performance is great, applying it is quick and easy.
The process begins with thoroughly cleaning the roof, where you will sweep away debris and use a pressure washer to get rid of heavy buildup. Then, once it dries, you can make any repairs before mixing and applying the aluminum coating. The process requires time for the coating to dry, so take that into account before starting.
One thing to note is that fibered aluminum roof coating products tend to be highly flammable, so you must keep them away from open flames. You should take that into account during use and storage.
Cleaning the Roof
It is always important to clean the roof before you do any type of work up there. Cleaning will prevent potential safety issues and ensure nothing gets trapped beneath the aluminum coating during application. You will first find a way onto your roof, then remove debris. If needed, you can even use a pressure washer for heavy buildup before letting things dry and moving on.
Get on the Roof
Multi-story commercial builds often have stairwells or ladders attached to the side of the building that allow you to access the roof. If those are an option, use them. Otherwise, you will need to use a portable ladder that is several feet taller than the roof or step out of a window onto the roof, depending on the build of your home.
Either way, get onto the roof carefully, finding your foot and remaining a few feet away from the edge at all times. Safety should always come first, so avoid vents, skylights, and anywhere that shows signs of rot or damage. You might even want to consider having someone steady the ladder as you climb and setting up a safety harness.
Remove Debris
The larger pieces of debris, such as leaves and twigs, can be gathered by hand, especially if they are collected in a gutter or somewhere else easy to reach. Try placing all of the debris in a garbage bag, which you can easily throw away later to avoid having to pick it up from somewhere else later.
Anything remaining on the roof, including dust and dirt, is easy to remove by sweeping. The best choice is a stiff brush, which will help you get rid of everything with several passes. Attempt to go from one side to the other and leave behind as little debris as possible so that it does not show up in the finish.
Alternatively, you can use a shop vac to suck up any dust and dirt. Doing that means you do not have to worry about cleaning the small debris up at ground level later.
Pressure Wash Heavy Buildup
If there is any buildup that cannot be removed with a quick brushing, you will want to consider a pressure washer. It is effective against mold, mud, and oil stains, though some particularly stubborn spots might require special cleaning solutions meant to be used on roofs.
Generally, a pressure setting between 30 and 50 psi will be sufficient to make things spotless, but the exact needs will vary. After sweeping the area and loosening things up, you can usually turn it down to around 20 psi to rinse things off.
Let It Dry
Not only will aluminum coating not properly adhere to a wet roof, but you should never climb on a wet and slippery roof. With that in mind, give the roof time to dry after washing it, waiting a minimum of two hours, even on a clear, warm day. However, you might have to wait anywhere up to 24 hours.
Repairing Any Damaged Areas
Before applying the aluminum coating, you want to ensure there is no damage. In particular, pay attention to cracks or holes, which should be patched before you do anything else. After you use a patching compound, you will sand it down and sweep the roof one more time before getting started with the coating.
Do a Thorough Inspection on your Roof
While serious damage will likely need more extensive repairs and even professional roofers, you can fix minor damage using roofing cement or epoxy. So, take a quick look around the roof, keeping an eye out for holes, cracks, weathered spots, and anything else that looks like a problem. These issues will need to be solved prior to the coating.
Patch Cracks and Holes
A crack or hole can be fixed with roofing cement or something similar, and it is usually a simple fix. You just need to apply as much compound as needed to fill each problematic spot and spread it until it is smooth. While most compounds can be spread with a trowel or putty knife, some epoxies require special tools.
Once you have the areas filled, give the compound enough time to harden. The only exception is if the area is larger than around three or four inches, in which case, you will want to press high-strength roofing mesh into the compound while it is fresh. The mesh increases the repair’s durability.
Allow Patching Compound to Dry
The best bet is to check the product for specifics on how long it takes to dry. However, most products will start setting in around 90 minutes and fully harden in around three days. The weather will also impact the time. Just make sure not to handle the cement or oxy while it is wet to avoid blemishes.
Sand the Patched Area
Once the patching compound is dry, you can start sanding it using high-grit sandpaper, which should be within the range of 100- and 120-grit. Use a smooth, circular motion until all lumps and ridges are worn down, creating a smooth surface. It should look the same as the surrounding roof. You can also consider a power sander for faster results.
Sweep the Roof Again
There will be debris from the sanding, which will need to be swept away to avoid problems with the finish. Take the stiff broom you used before and clean the roof once more. An alternative is to use a hose to wash the roof, but that would mean waiting for it to dry again before moving on to the aluminum coating.
Mixing the Aluminum Roof Coating
Mixing the aluminum roof coating is the final step before you can apply it. However, you still need to prepare a few things, including protective equipment. It is also important to wait for optimal weather conditions since rain will affect the process. Once you have the proper equipment and a plan, the mixing can begin.
Wait for Optimal Conditions
The weather does not have to be clear and sunny every day, but there should be no rainfall for 24 to 36 hours after the application of the coating. Therefore, look for a period of clear days to do the work. Preferably, pick days when it will be between 60 and 100 °F with low humanity for the fastest drying.
If you fail to pick good days, complications could arise. Excessive moisture can cause a splotchy finish, while intense heat will interfere with the drying process.
Prepare Protective Equipment
Dealing with aluminum coating requires protective equipment. Closed-toed shoes, thick work gloves, and protective eyewear and the basics that must be used, but you should also consider wearing clothes you do not mind getting stained. Additionally, if you have sensitive airways, consider a mask to filter the fumes.
Open and Mix the Aluminum Roof Coating
Before you get started, keep in mind that you will need around a gallon of aluminum coating for every 50 square feet of roofing. Once you have the coating, go ahead and open a bucket. Inside you should see a thin, black liquid at the top, which is due to natural separation.
Because of the separation, you will need to mix the coating before use, which is made easier by using an electric drill with a mixing paddle. Push it to the bottom of the bucket and begin mixing, running it at the lowest speed until it has a shiny, uniform metallic color. You can also mix manually, but it will take far more time and effort to reach the proper consistency.
Rolling on the Coating
When you go to roll the coating on the roof, make sure to start in a far corner, working back toward your access point. Doing so will ensure you do not trap yourself and make for the most efficient work. Other than that, you simply have to pour the coating over small sections and roll it into a thin layer, going bit by bit until it is over. After that, it is all about letting it dry and getting the tight areas that are difficult to coat with a roller.
Pour Coating Over a Small Section
When dealing with the aluminum coating, slowly pour around a quart of it over a five- or six-foot strip. Do not use too much since it spreads evenly. Instead, focus on pouring just enough and smoothing it out a little at a time, being careful not to get any on your clothes as you do.
Roll the Coating Into a Thin Layer
Once you have the strip of coating poured out, take a 3/4-inch nap roller and start spreading an even, thin layer. You can use a back-and-forth motion over the fresh coating, keeping your strokes in the same direction for consistency.
Make sure not to leave any gaps or lines in the finish, and cover an entire section of the roof before going to the next section. You might also consider using a long-handled roller to cover larger areas and avoid the strain of bending.
Continue Pouring and Rolling Coating
You want to use the same method to cover the entire roof in the aluminum coating, working from one corner of the roof to the other. It is important that you blend the edges of each section so that everything is seamless. Once you finish, make sure to remove all tools and leave the coating alone to let it dry.
Let the Coating Dry
The coating needs to become dry to the touch before you can take care of the smaller details. In part, that is because you need to be able to walk on it, which usually takes between five and eight hours. However, weather and other factors can influence the time it takes to dry, so do not rush things.
Take Care of Tight Areas and Edges by Hand
When the coating you applied before is dry, you can start taking care of tight areas and any edges. At this point, using a roller is difficult, so grab a handheld brush and dip it in the coating. After that, start applying a layer at corners, crevices, recesses, and anywhere else that needs it. Try to use long, linear strokes for the best finish.
Allow the Coating to Cure
It might take an entire day for the coating to cure and provide protection against moisture, pressure, and heat. However, once it successfully dries, it will seal and protect the roof, extending its lifespan. While that is happening, you can start cleaning your tool, which is made easier by soaking them in mineral spirits.

How to Replace Damaged Roof Shingles
When shingles are damaged, it can impact the lifetime or your roof. It can also lead to more severe damage if a leak occurs, potentially harming the structure below the roofing. That is why it is important that you take the time to check for damaged shingles on a regular basis, replacing them as needed.
When working on the roof, make sure to pay attention to your safety, using a pro if you feel uncomfortable doing it yourself. Otherwise, you can follow the instructions below to evaluate, remove, and replace any damaged shingles on your roof.
Remove the Damaged Shingles
Once again, take safety into consideration before anything else. Once you are fully prepared, you will then begin to evaluate the damage and plan your repairs. That means waiting for the weather to be good, then loosening the damaged shingle before removing it entirely. Make sure not to leave any nails or debris during the removal.
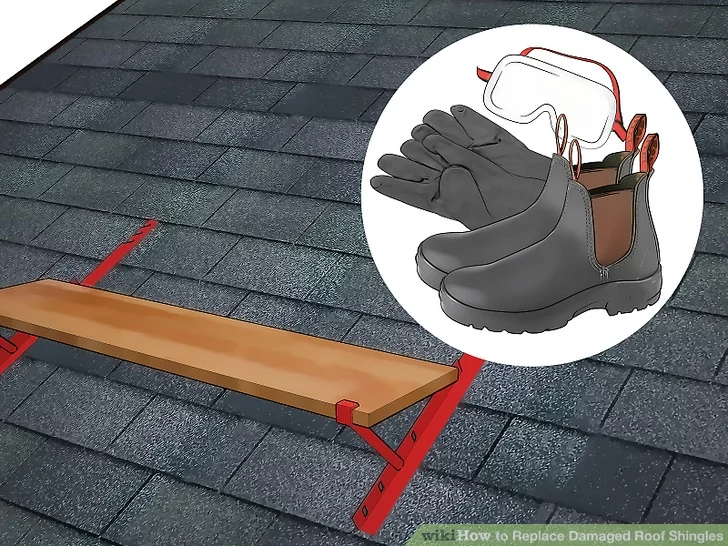
Safety Precautions
All roofing work requires you to take serious precautions since a single slip could result in a devastating fall. You also have to be careful of debris when working, which is why protective eyewear is a must. Heavy-duty gloves and gripping boots to help you walk stably are also great pieces of equipment to keep you secure and free from harm.
When accessing the roof, ensure you use a steady ladder if one is required, preferably having someone else hold it from below. If you have to access the roof another way, make sure to be equally careful, and once on the roof, take slow and cautious steps, especially around the damaged area.
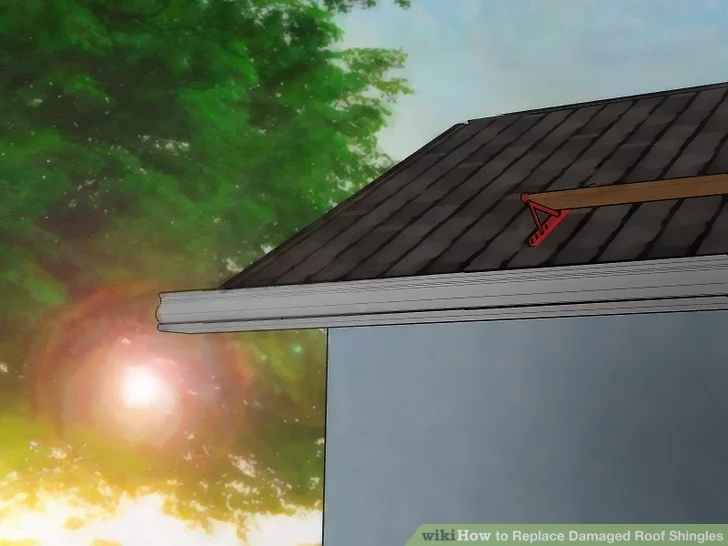
If you are dealing with a particularly steep or complicated roof, you might want to consider a harness and roof jacks. They provide extra safety, though they are not necessary on every job.
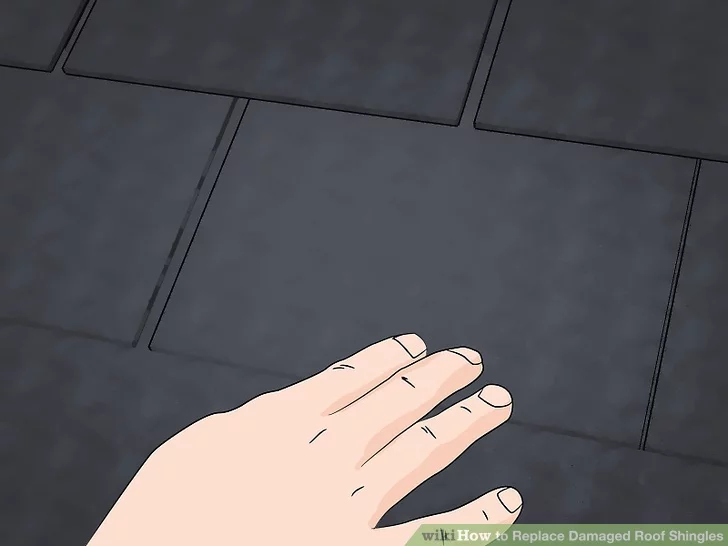
Evaluate the Damage
If you have not already, go ahead and find the damaged shingles. Make sure to inspect your entire roof while you are at it, ensuring there is no other damage. It is especially important to do a proper inspection if the roof is old or if there was severe weather prior to the damage.
After finding all of the damaged shingles, figure out how many replacement shingles you need and check for additional damage underneath. It is also helpful to take a close look at surrounding shingles for damage or curling.
You will also want to check for damage to any moisture barrier or flashing, as well as keep an eye out for signs of seepage. If there is seepage or moisture getting in, replacing the surrounding shingles is not a bad idea.
There is also the chance that a complete re-roofing is in order, which involves replacing all of the shingles from the roof. Re-roofing a home is especially common when a roof is nearing the end of its lifespan.
On the other hand, if the damage is limited to cracks or splits, a simpler repair might be better. If the shingles are still in decent condition, minor damage can be repaired in other ways, such as using a sealant.
Consider the Weather
Before removing shingles, keep the weather in mind. Warm weather will cause asphalt and asphalt sealant to become flexible, which makes them harder to remove. On the other hand, cool weather causes them to become stiffer and brittle, causing them to be easier to remove.
To make things easier for yourself, either choose a cooler time of year or try removing shingles earlier in the day. You can also try wetting them to cool them down if you are working when it is hot. All you have to do is use a bit of water, and the shingles will tighten and become firmer.
Loosen the Adhesive
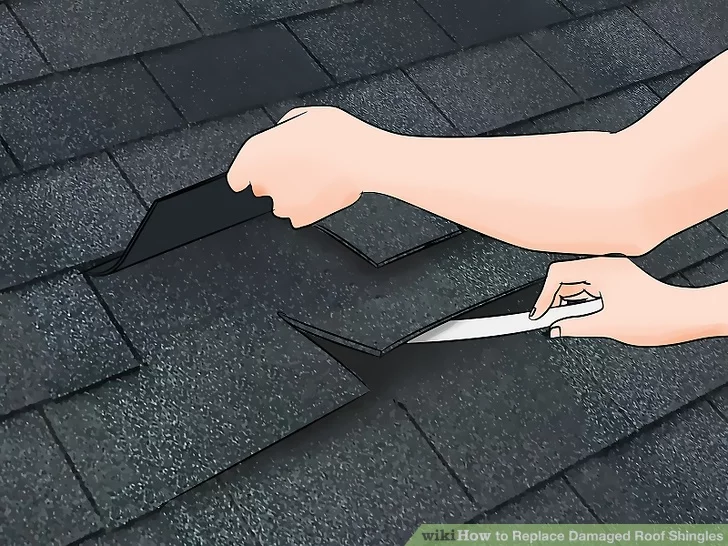
There is adhesive keeping everything in place, so you need to loosen things up to get to work. Start by loosening the adhesive beneath the tabs two rows above the damage, utilizing a small tool to do so. Great choices include a pry bar, crowbar, or the claw of a hammer, which are great for loosening adhesive and nails to pry up shingles.
Remove a minimum of five tabs in the second row above the damaged shingle, which should be enough to see the nails you will be removing. Also, end seams need to line up around a foot to the side of the damaged shingle, so pull away shingles around the damaged area to ensure you get it all.
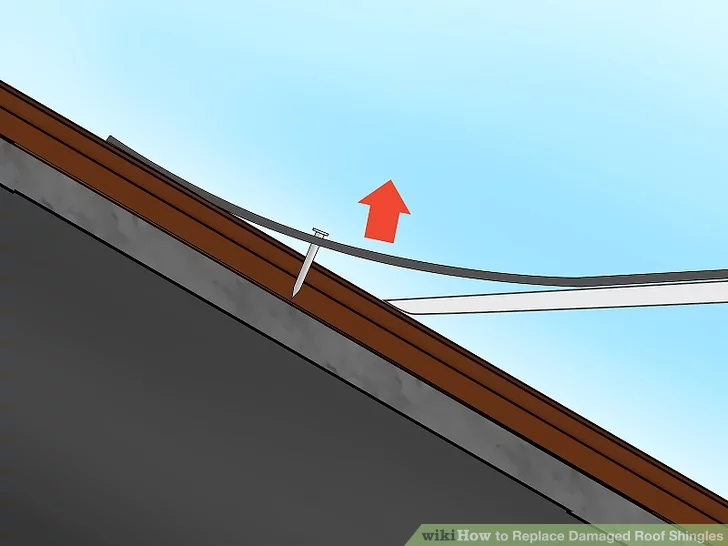
Loosen Any Exposed Nails
The next step is loosening up exposed nails, which you will do with your chosen tool. Insert the tool beneath the shingles around the damaged area and work around the nail to pull it up. The process involves carefully lifting each surrounding tab by 45° to 60°, going slow but firmly.
The goal is to get the surrounding shingles up without breaking or cracking them, which will allow you to simply reattach them when you finish the repairs.
Work Closer to the Damaged Shingle
The work began with the shingles furthest away from the damage, but as you go, you should slowly approach the damaged shingles. Repeat the same process as above to loosen any adhesive and nails until you finally reach the damaged shingle.
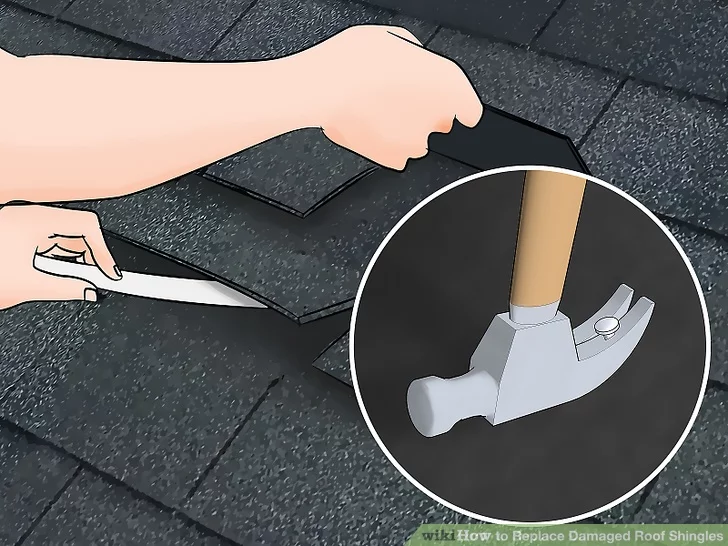
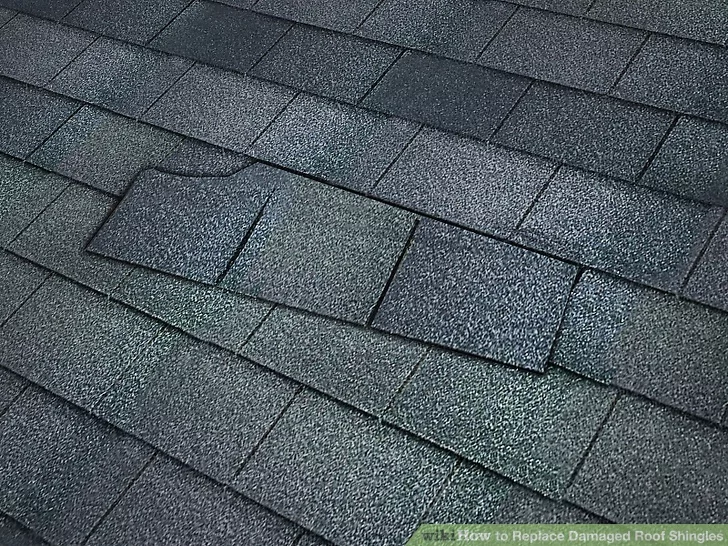
Remove the Damaged Shingle
Upon reaching the damaged shingles, remove the adhesive below one before pulling it free and discarding it. Do the same with any other damaged shingles, tossing any that are seriously damaged. You will soon replace these with new shingles, though they should be the same style as the rest of the roof.
Replace the Damaged Shingles
After removing all of the damaged shingles, it is time to replace them with new shingles of the same style. You will start by getting your replacement materials, assuming you have not already. Then, you will install the new shingle, reseal it, and secure any other loose shingles around the area.
There is also a brief section below on dealing with cracked or split shingles, which do not require a full repair. It can also be useful if you caused some slight damage while loosening the shingles around the damaged area.

Procure Replacement Materials
To start, you will need replacement shingles, which need to match those already on the roof. When dealing with shingles, that usually means three-tab asphalt shingles since they are the most common. Regardless, choose the same type and buy enough to replace all of the damaged shingles. Moreover, getting a few extra is a good idea.
Additionally, you will need shingle cement or adhesive to seal the edges of the new shingles and secure loose ones. Of course, some shingles come with adhesive pre-installed, but you will still find it useful for any loose shingles, so go ahead and grab some.
Nails are also a must. They secure shingles to your roof, and many three-tab shingles come with holes meant for nails to let you know how many to use and where to hammer them in. Just make sure to grab roofing nails since they are durable and long enough to get the job done right.
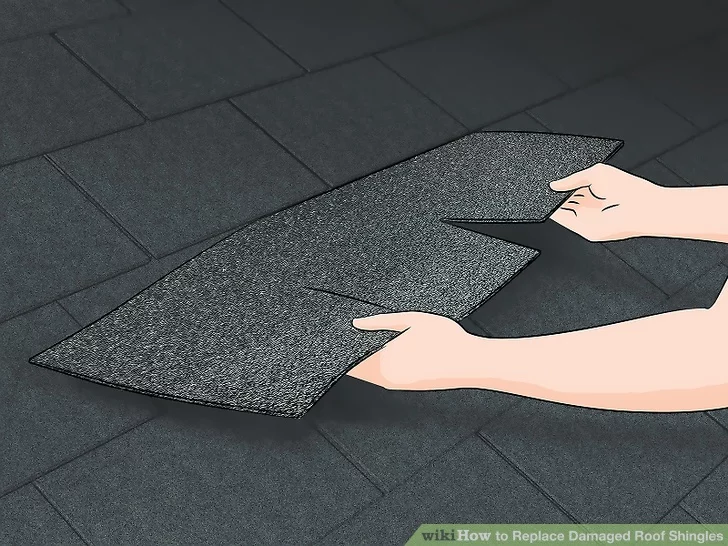
Install the New Shingle
The new shingle should go exactly where you removed the damaged one. If the shingle has adhesive on it, take off the cover before pushing it in, then secure it using nails. If there are holes provided for the nails, use them as a guide. Otherwise, read the instructions that came with the new shingles or follow what was done to the shingles already in place.

Reseal the Edges
Sealing the edges helps protect your roof and keep things from moving. Therefore, you will want to lift each tab and apply a 1-inch bit of shingle cement beneath each tab. After the cement is in place, firmly press down on the shingle until it is secured. Do the same for each new shingle, then move on to the loose shingles above.
Secure Any Loose Shingles
Do not limit your attention to the shingles you loosened yourself to access the damaged area. Keep an eye out for other potentially problematic areas, such as curled or worn shingles, which could result in moisture getting through. If you see any such areas, add some adhesive, making sure to be gentle as you lift the tabs.
While it might seem like an afterthought, loose shingles are common and threaten the longevity of a roof. Regular touch-ups to loose or worn shingles will prevent water from getting beneath the roof and causing problems.
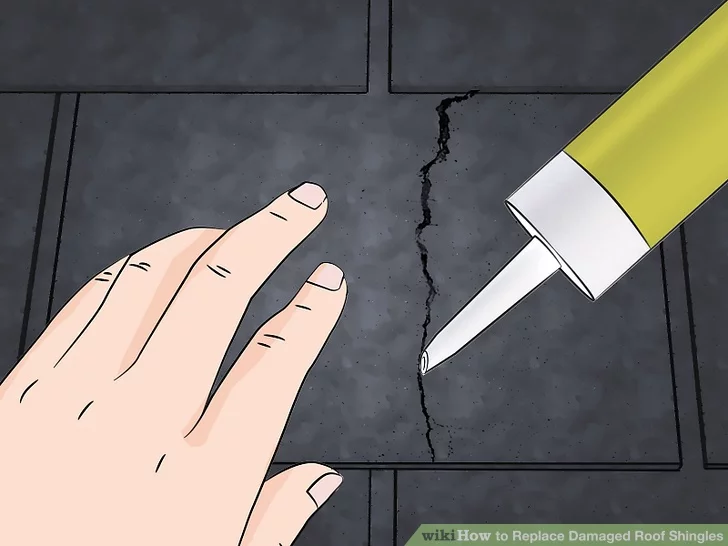
Fix Cracked or Split Shingles
Cracks and splits are much easier to repair than other damage, especially if they are small and clean. All you have to do is use some adhesive to repair them, lining any crack with a generous amount before sticking it back together. It might take a few seconds to dry, so hold it for a time before letting it go.
Even if the damage is slight, you will need to replace any shingles that prove stubborn. That includes brittle and curled shingles, as well as those that do not want to go back down with adhesive.
With over 12 years of construction industry experience, David Bitan specializes in restoring, inspecting, maintaining, and repairing roofs for residential, industrial, and commercial properties.

How to Lay Shingles
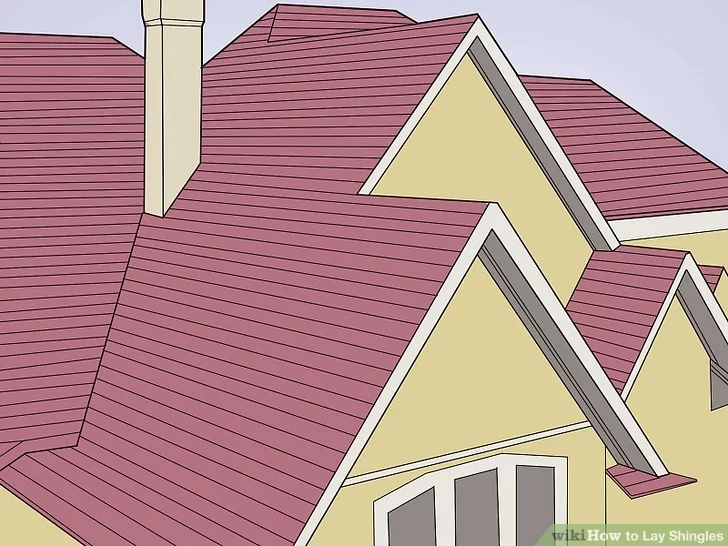
There are various types of roofing available, but one of the best ways to protect a sloped roof from rain, snow, and hail is by using shingles. If done well, it will provide protection for 20 to 40 years, allowing you to put water damage and leaks out of your mind.
Singles are also a great way to add an appealing crown to your home, improving the aesthetics and increasing the value of your home. But getting them in place is difficult and hot work, even if it is worth it in the end. Below, you will find detailed information on laying shingles and using alternate patterns.
Laying the Shingles
The first thing covered will be actually laying the shingles. It will involve sizing them correctly and placing them down. It will also cover working around stacks, vents, and chimneys if there are any you have to worry about. Additionally, the article will touch on flashing around chimneys and placing shingles on ridges.
Getting the Sizing Right
Sizing shingles is an important step, but it requires you to have an idea of how you are organizing your rows and courses. There are those that like to have multiple sizes of the basic three-tab shingles, which requires cutting based on the course. By doing so, you alter the area you must fill for each of the rows and shift the “slots.”
If you decide to cut for multiple sizes, there are some cuts that might come in handy. The first is achieved by cutting half of a tab width off of the first tab for the first course shingles. The second course requires you to cut a full tab, while the third and fourth course shingles require you to cut 1.5 and 2 tabs off, respectively. Cut off half of the final tab for the fifth course, and keep all tabs for the sixth.
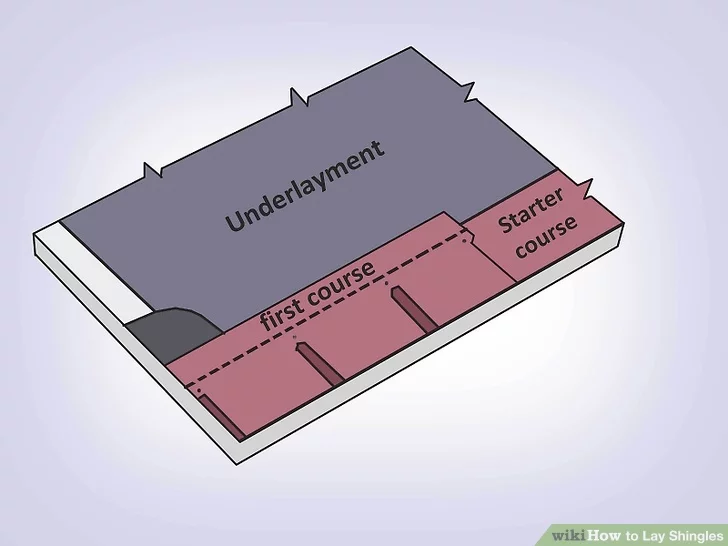
Putting Down the Starting Row
Once you have the sizing down, it is time to begin laying your starting row. You will place the row at the bottom edge, nailing your three-tab shingles around ¾ inches above the cutouts. That will be close to the meeting point of the tab and the upper part of the shingle. When nailing, be careful not to hit it into the tar strip.
There should also be nails two inches away from each end that are lined up with the other two, meaning there will be four per three-tab shingle.
By doing things this way, you can keep the nails covered by the next shingle. It will also ensure that the nails used in the next row go through and secure the top of the lower row’s shingle. That also means each of the shingles is secured by eight nails in all.
Additionally, if you use a nail gun — a great tool to make the job easier — you will want to be careful of shooting the nails deeper than necessary. You can tell a nail is too deep if it nearly makes its way through a shingle. If that happens, the nail will eventually loosen, which you do not want. To fix the problem, simply reduce the settings on the nail gun until you achieve the desired result.
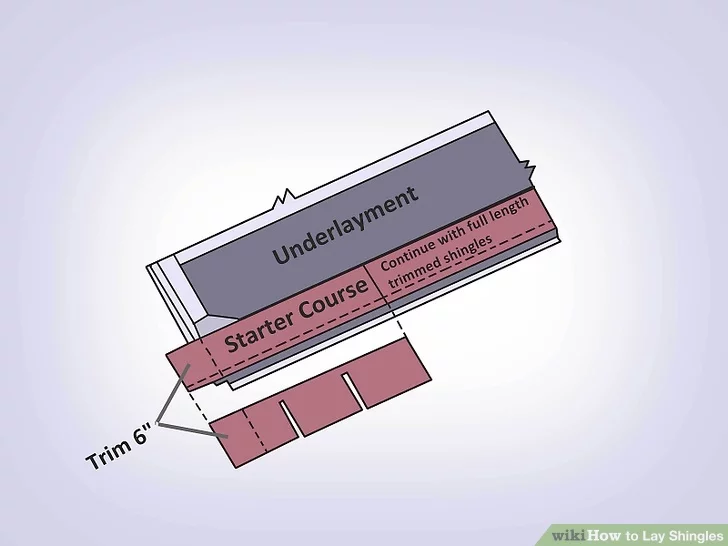
The First Row
At this point, it is time to put the first row of shingles down. When doing this, make sure to cover the entire starter row. You can add a chalk line directly above the starter line for guidance.
Before you nail the first starter shingle row into place, you will want to remove a six-inch section from the length. After that, you can proceed to use the full-length shingles. The method is referred to as the “straight up” way, and you want to do it in order to join the ends of the first regular row.
Some shingles on the market come with a special starter row or material that can be sized to the length of the roof. Another method is using a full row by flipping them so that the tabs are facing up.
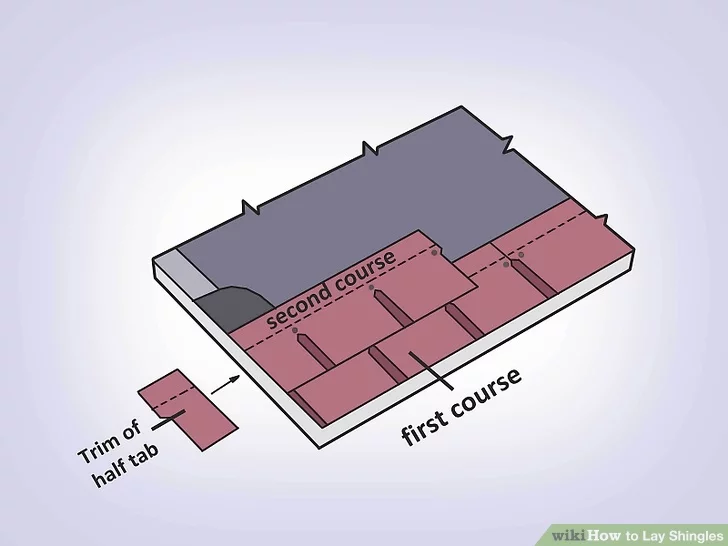
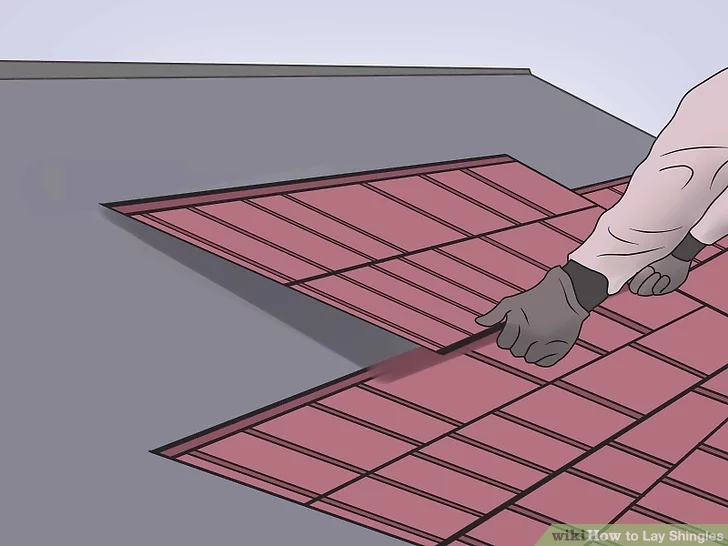
The Second Row
The starter and first rows require some extra effort, but things are less complicated once you move on to the second row. However, you do want to set the first shingle on the row back a bit. In this case, half of a tab in length will be enough. The goal is to offset it from the first row so that the bottom of the tabbed portion is barely touching the top of the cutouts on the shingles beneath. The removed half of a tab should be on the left side.
At this point, vertical chalk lines might be useful. You can snap them in place from the inside edges of the first shingle and first shingle on the second row to the top of the roof, using them as guides for future odd and even-numbered rows. After that, keep going horizontally up the roof, only stopping once you have reached the peak.
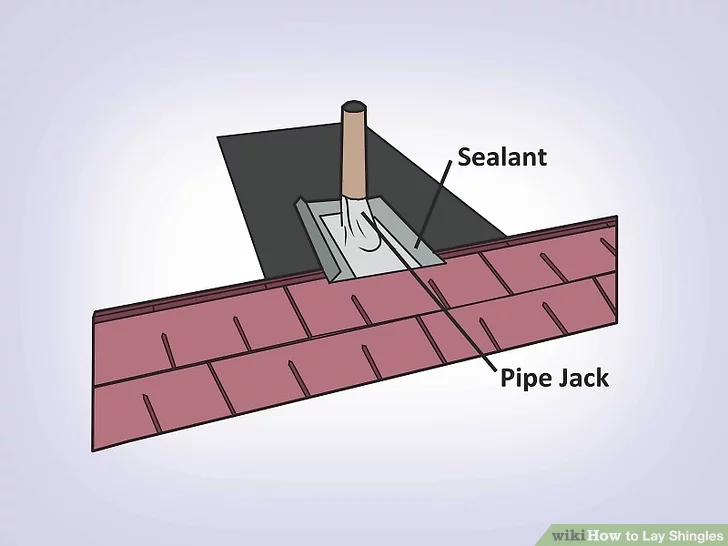
Shingling Around Obstacles
There are things on a roof that might get in your way, such as stacks, vents, and chimneys. When you run into these obstacles, nail aluminum sheeting into place to cover any holes you can get a finger into. Doing so will protect the roof from leaks, cracks, and more.
These obstacles have surrounding metal flashing placed over tar, and shingles need to be interlaced with it. It is common to cement and nail flashing beneath the top layer of shingles while placing it over those on the sides, allowing water to flow down without getting beneath the interlaced area.
When dealing with stacks and vents, the bottom few rows that meet the flashing should go beneath it, with the upper rows being placed atop it.
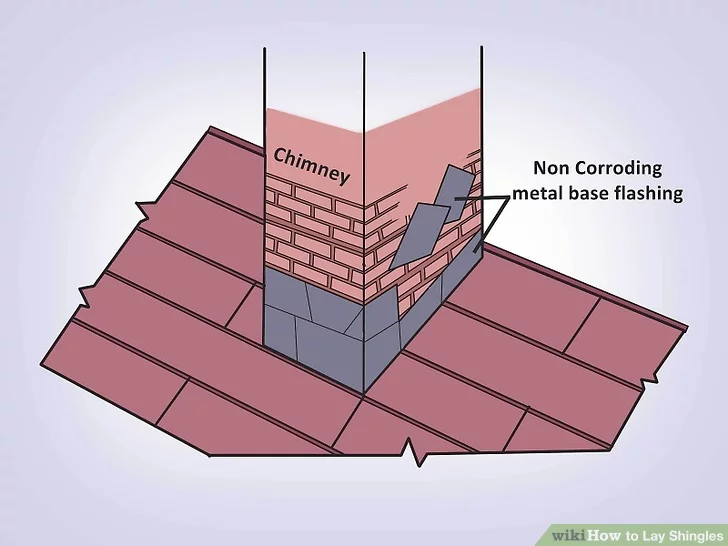
Dealing With Chimneys
Chimneys are not the easiest obstacle to navigate, but they are very important to get right. If something goes wrong, you could end up with a leak or water damage that corrodes bricks and eventually causes something serious.
The goal is to interlace the flashing around the chimney with rows of shingles. You start by grabbing a sheet metal flashing apron. Once you have it in hand, place it over the top edge of the chimney flange. You then want to put down shingles atop it, following up by cementing an additional apron over the lower half.
From there, cover the lower apron on the cemented side layers of flashing that are tucked beneath the top apron with asphalt roofing cement.
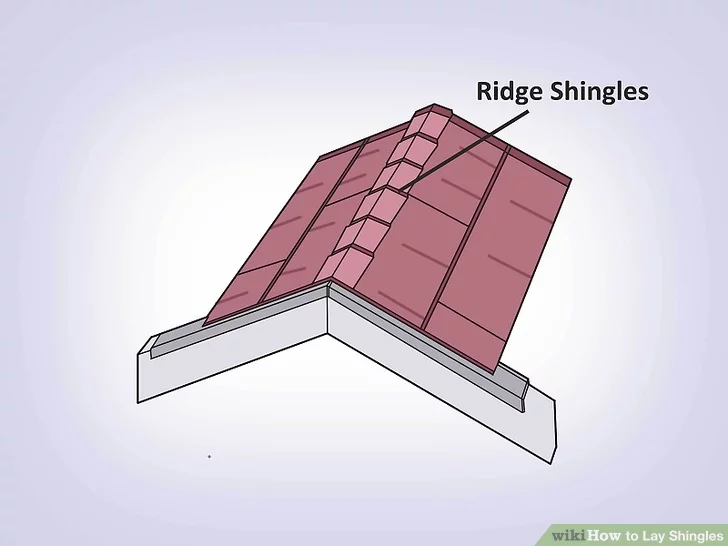
The Ridge
After taking care of both sides of a section of the roof, you will need to deal with the ridge. You can bring the ridge edges together using a ridge-capping layer, which can be done with specific shingles meant for the job or by cutting and bending ordinary shingles until they fit well. Regardless of what you use, nail them down using longer nails that can go through additional layers.
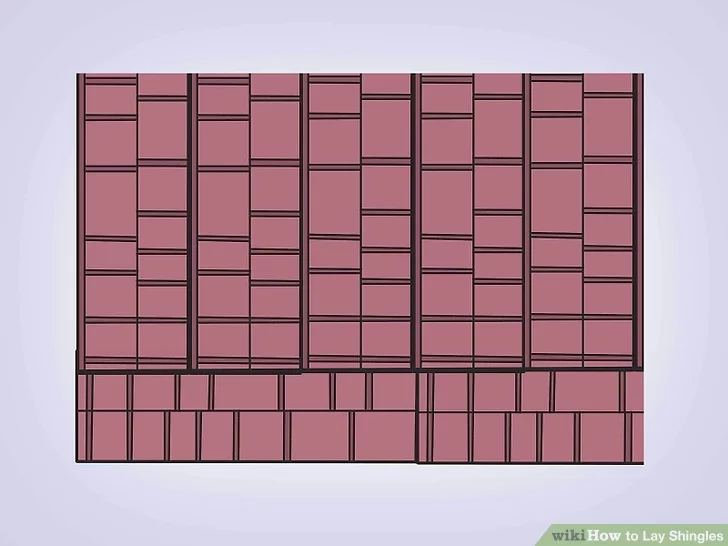
Alternative Patterns
The pattern you choose can affect the life of the shingles and your roof, making it an important choice. Fortunately, the pattern described in the steps above is an easy and efficient way that is often used. But some professionals use different patterns, believing other ways are more efficient and provide a longer life.
The alternative methods are different due to the overlap and pattern they are installed in, with the basics including the “straight up” pattern, the half pattern, and the 4-inch and 5-inch offset patterns.
The Half Pattern
Since the “straight up” method has already been discussed in detail, the first alternative pattern you should know about is the half pattern. It is achieved by staggering the courses, which is basically how all of the patterns work. Half refers to six inches, so that is the level of offset you want.
By offsetting your shingles by six inches, you will be protecting the butt joints. That is because, on the seventh course, the joints will align, providing stability and protection that is great against water moving horizontally down the roof.
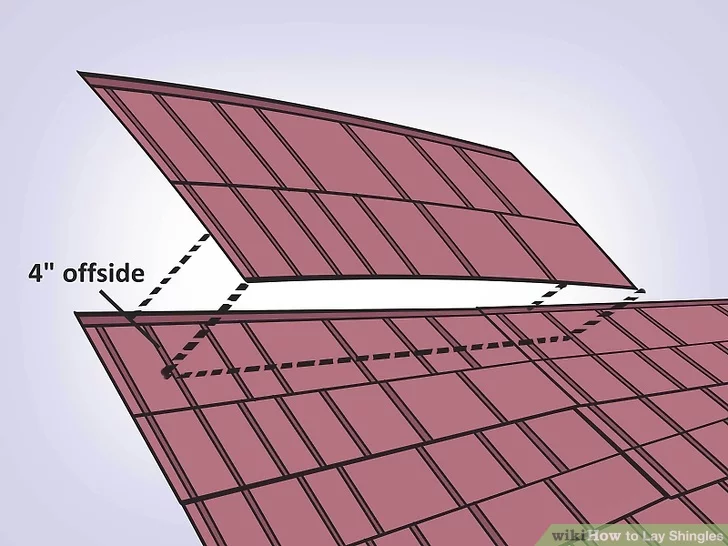
Offsetting by Four and Five Inches
Just like the half pattern, these offset methods provide additional protection. Moreover, the only real difference is the offset, which alters when they realign. When dealing with four-inch offsetting, it will occur every ten courses. On the other hand, five-inch offsetting will see alignment every eight courses.
If you decide to go with four inches, it will be relatively easier since it is a short overlap. But it comes with the cost of not being a great choice in very cold or wet environments. Five inches offers a great pattern with a lot of protection. It is effective against runoff, helps hide irregularities, and is efficient for the price.
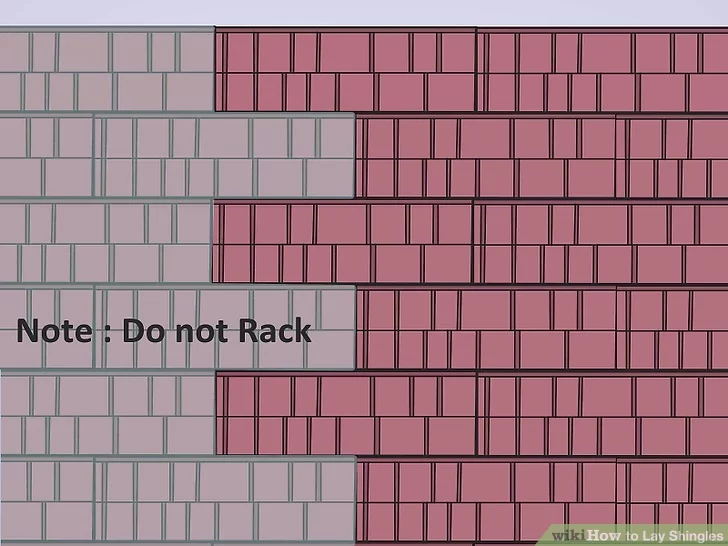
Racking Shingles
Another technique you might want to consider is racking, which will save you time and make working a bit easier since you will not have to move around as much. It works by using two sizes of the first shingle of each row. That includes the ordinary three-tab shingles and shortened pieces for each end, and it means working vertically.
It is worth noting that this technique can cause something called “pattern curling.” It occurs when shingles curl and blow in the wind where columns join, due to the lifting of the shingles to place and nail the next. If it happens, water might get beneath and cause leaks where the columns join.
Because of the risks, it might void the warranty where leaks and useful life are concerned. However, it is not an uncommon technique for contractors.
FAQ
Do I need to underlay before installing shingles?
Installing underlayment is a great way to protect your floors from leaks and water damage.
What is the lowest air temperature for roof shingles?
The right weather is key to a successful installation. Make sure you wait until temperatures average 55 degrees Fahrenheit before installing shingles in your home.
With over 12 years of construction industry experience, David Bitan specializes in restoring, inspecting, maintaining, and repairing roofs for residential, industrial, and commercial properties.
Claim Your Free Roof Inspection Today.
Roof issues are a buzzkill, but not with Bumble Roofing on your side.
Fill out the form, and our expert team will assess the condition of your roof to advise on the best course of action to maintain the health and longevity of your roof.