
How to Lay Shingles
There are various types of roofing available, but one of the best ways to protect a sloped roof from rain, snow, and hail is by using shingles. If done well, it will provide protection for 20 to 40 years, allowing you to put water damage and leaks out of your mind.
Singles are also a great way to add an appealing crown to your home, improving the aesthetics and increasing the value of your home. But getting them in place is difficult and hot work, even if it is worth it in the end. Below, you will find detailed information on laying shingles and using alternate patterns.
Laying the Shingles
The first thing covered will be actually laying the shingles. It will involve sizing them correctly and placing them down. It will also cover working around stacks, vents, and chimneys if there are any you have to worry about. Additionally, the article will touch on flashing around chimneys and placing shingles on ridges.
Getting the Sizing Right
Sizing shingles is an important step, but it requires you to have an idea of how you are organizing your rows and courses. There are those that like to have multiple sizes of the basic three-tab shingles, which requires cutting based on the course. By doing so, you alter the area you must fill for each of the rows and shift the “slots.”
If you decide to cut for multiple sizes, there are some cuts that might come in handy. The first is achieved by cutting half of a tab width off of the first tab for the first course shingles. The second course requires you to cut a full tab, while the third and fourth course shingles require you to cut 1.5 and 2 tabs off, respectively. Cut off half of the final tab for the fifth course, and keep all tabs for the sixth.
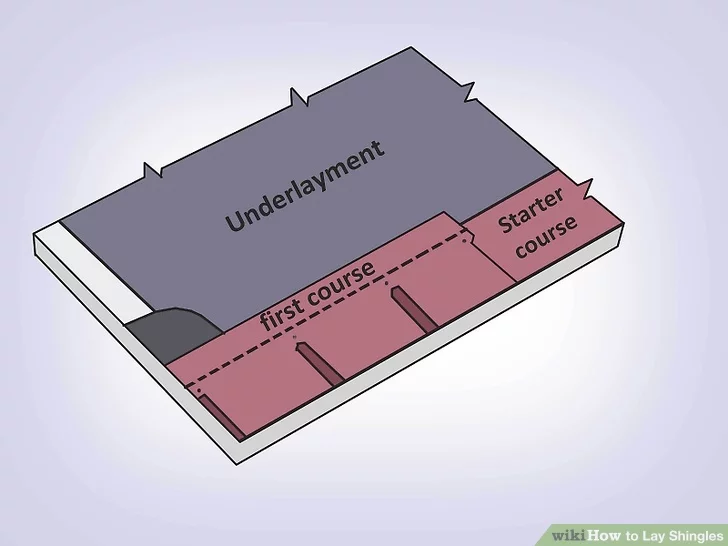
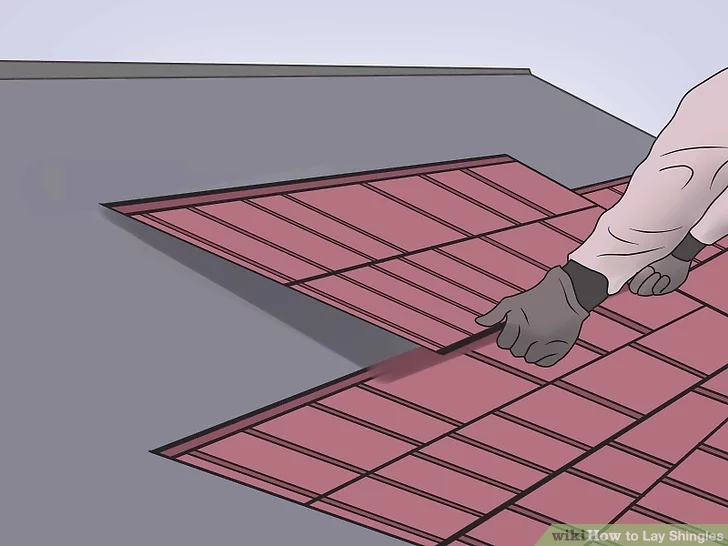
Putting Down the Starting Row
Once you have the sizing down, it is time to begin laying your starting row. You will place the row at the bottom edge, nailing your three-tab shingles around ¾ inches above the cutouts. That will be close to the meeting point of the tab and the upper part of the shingle. When nailing, be careful not to hit it into the tar strip.
There should also be nails two inches away from each end that are lined up with the other two, meaning there will be four per three-tab shingle.
By doing things this way, you can keep the nails covered by the next shingle. It will also ensure that the nails used in the next row go through and secure the top of the lower row’s shingle. That also means each of the shingles is secured by eight nails in all.
Additionally, if you use a nail gun — a great tool to make the job easier — you will want to be careful of shooting the nails deeper than necessary. You can tell a nail is too deep if it nearly makes its way through a shingle. If that happens, the nail will eventually loosen, which you do not want. To fix the problem, simply reduce the settings on the nail gun until you achieve the desired result.
The First Row
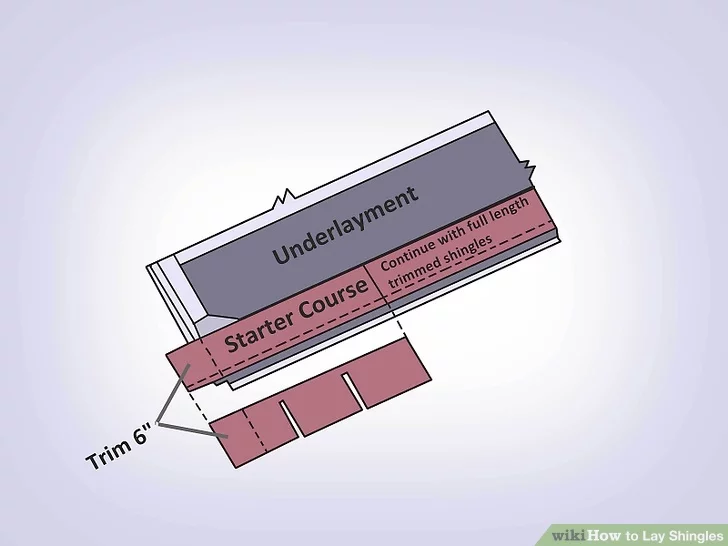
At this point, it is time to put the first row of shingles down. When doing this, make sure to cover the entire starter row. You can add a chalk line directly above the starter line for guidance.
Before you nail the first starter shingle row into place, you will want to remove a six-inch section from the length. After that, you can proceed to use the full-length shingles. The method is referred to as the “straight up” way, and you want to do it in order to join the ends of the first regular row.
Some shingles on the market come with a special starter row or material that can be sized to the length of the roof. Another method is using a full row by flipping them so that the tabs are facing up.
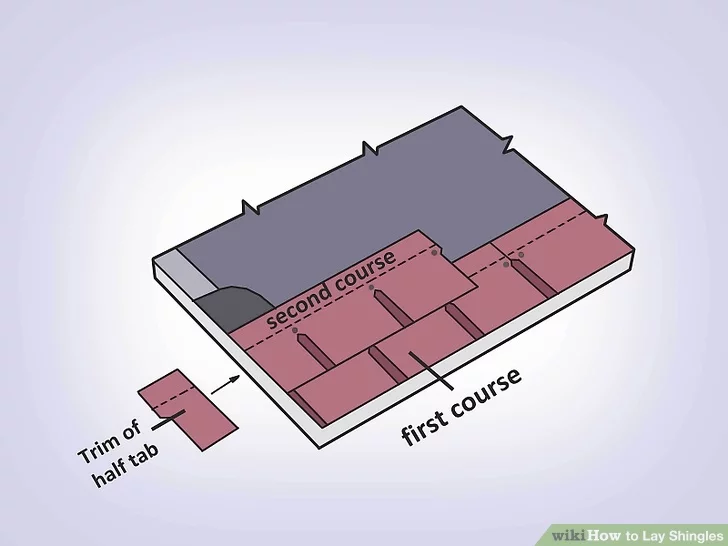
The Second Row
The starter and first rows require some extra effort, but things are less complicated once you move on to the second row. However, you do want to set the first shingle on the row back a bit. In this case, half of a tab in length will be enough. The goal is to offset it from the first row so that the bottom of the tabbed portion is barely touching the top of the cutouts on the shingles beneath. The removed half of a tab should be on the left side.
At this point, vertical chalk lines might be useful. You can snap them in place from the inside edges of the first shingle and first shingle on the second row to the top of the roof, using them as guides for future odd and even-numbered rows. After that, keep going horizontally up the roof, only stopping once you have reached the peak.
Shingling Around Obstacles
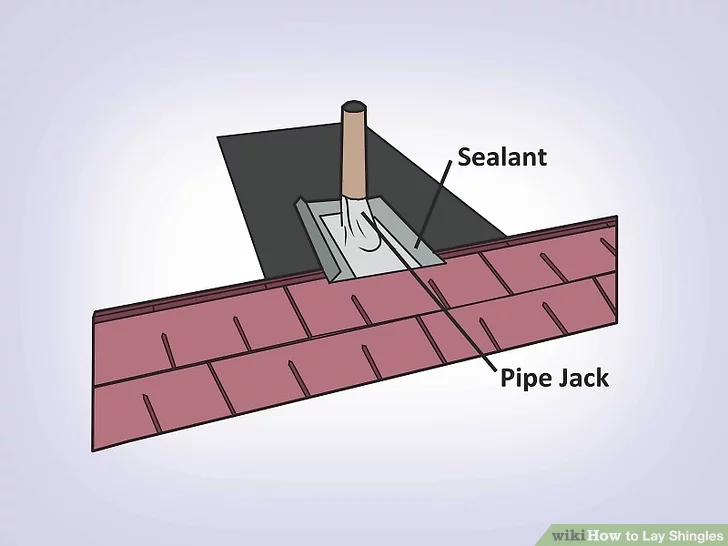
There are things on a roof that might get in your way, such as stacks, vents, and chimneys. When you run into these obstacles, nail aluminum sheeting into place to cover any holes you can get a finger into. Doing so will protect the roof from leaks, cracks, and more.
These obstacles have surrounding metal flashing placed over tar, and shingles need to be interlaced with it. It is common to cement and nail flashing beneath the top layer of shingles while placing it over those on the sides, allowing water to flow down without getting beneath the interlaced area.
When dealing with stacks and vents, the bottom few rows that meet the flashing should go beneath it, with the upper rows being placed atop it.
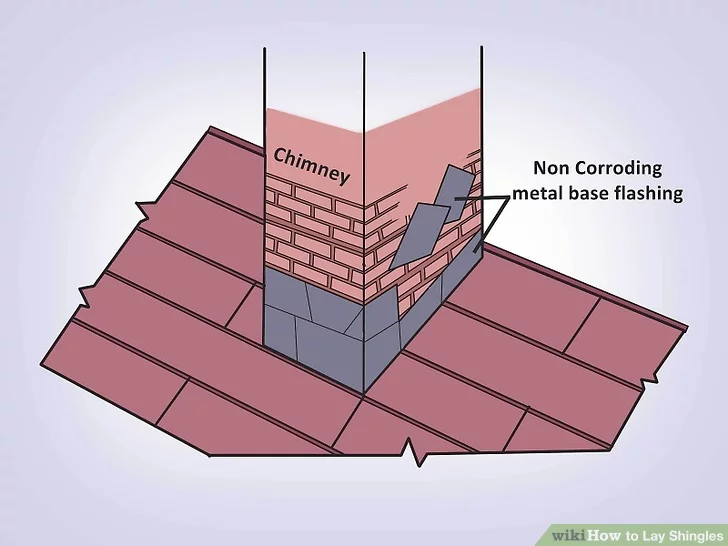
Dealing With Chimneys
Chimneys are not the easiest obstacle to navigate, but they are very important to get right. If something goes wrong, you could end up with a leak or water damage that corrodes bricks and eventually causes something serious.
The goal is to interlace the flashing around the chimney with rows of shingles. You start by grabbing a sheet metal flashing apron. Once you have it in hand, place it over the top edge of the chimney flange. You then want to put down shingles atop it, following up by cementing an additional apron over the lower half.
From there, cover the lower apron on the cemented side layers of flashing that are tucked beneath the top apron with asphalt roofing cement.
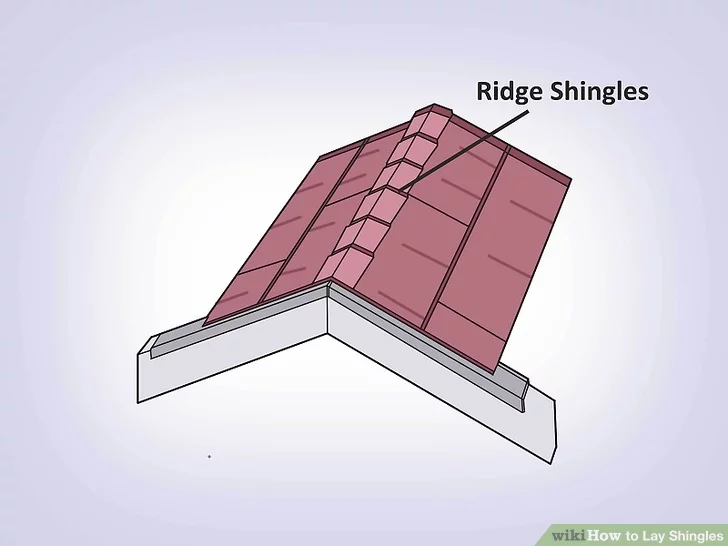
The Ridge
After taking care of both sides of a section of the roof, you will need to deal with the ridge. You can bring the ridge edges together using a ridge-capping layer, which can be done with specific shingles meant for the job or by cutting and bending ordinary shingles until they fit well. Regardless of what you use, nail them down using longer nails that can go through additional layers.
Alternative Patterns
The pattern you choose can affect the life of the shingles and your roof, making it an important choice. Fortunately, the pattern described in the steps above is an easy and efficient way that is often used. But some professionals use different patterns, believing other ways are more efficient and provide a longer life.
The alternative methods are different due to the overlap and pattern they are installed in, with the basics including the “straight up” pattern, the half pattern, and the 4-inch and 5-inch offset patterns.
The Half Pattern
Since the “straight up” method has already been discussed in detail, the first alternative pattern you should know about is the half pattern. It is achieved by staggering the courses, which is basically how all of the patterns work. Half refers to six inches, so that is the level of offset you want.
By offsetting your shingles by six inches, you will be protecting the butt joints. That is because, on the seventh course, the joints will align, providing stability and protection that is great against water moving horizontally down the roof.
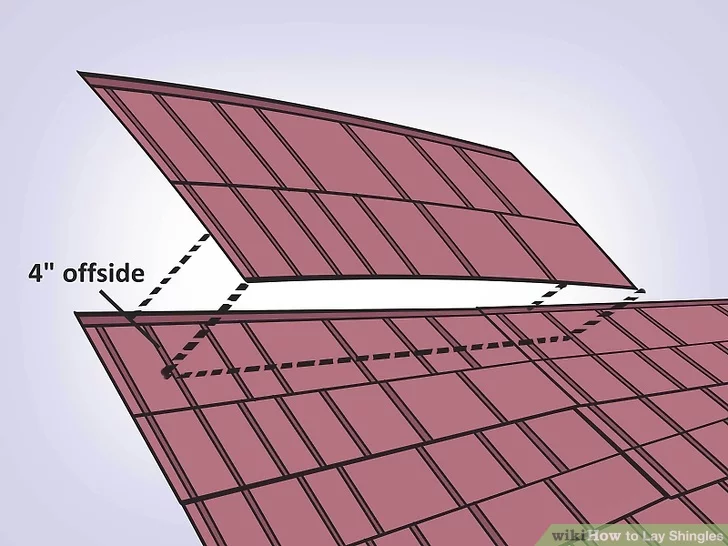
Offsetting by Four and Five Inches
Just like the half pattern, these offset methods provide additional protection. Moreover, the only real difference is the offset, which alters when they realign. When dealing with four-inch offsetting, it will occur every ten courses. On the other hand, five-inch offsetting will see alignment every eight courses.
If you decide to go with four inches, it will be relatively easier since it is a short overlap. But it comes with the cost of not being a great choice in very cold or wet environments. Five inches offers a great pattern with a lot of protection. It is effective against runoff, helps hide irregularities, and is efficient for the price.
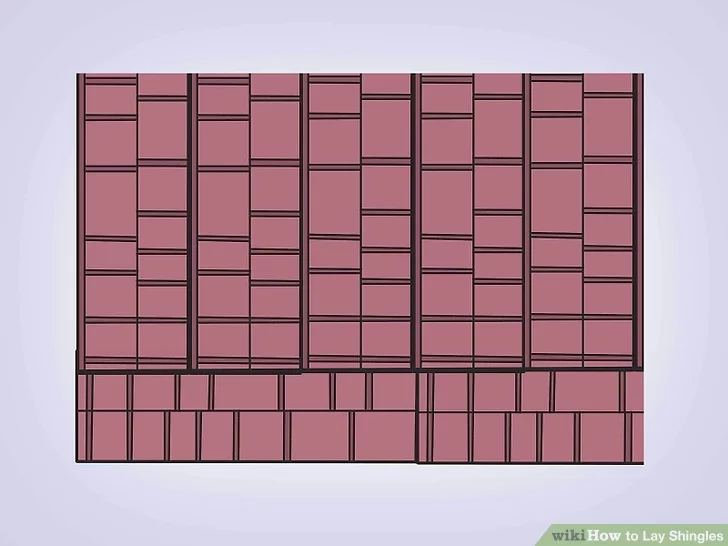
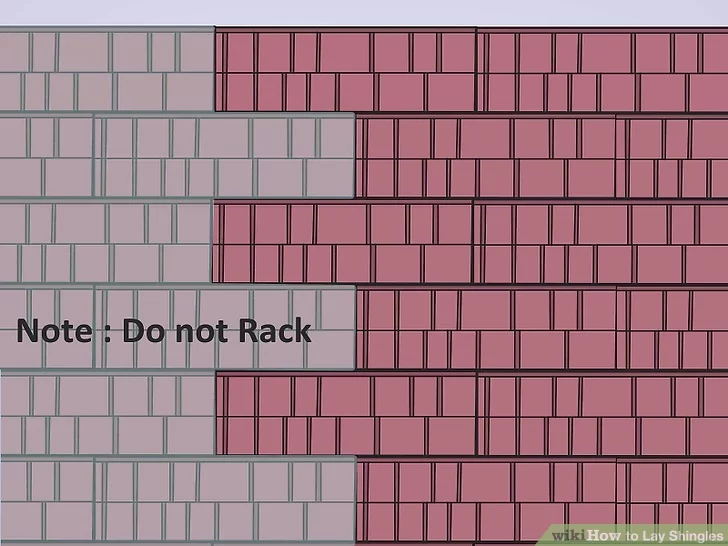
Racking Shingles
Another technique you might want to consider is racking, which will save you time and make working a bit easier since you will not have to move around as much. It works by using two sizes of the first shingle of each row. That includes the ordinary three-tab shingles and shortened pieces for each end, and it means working vertically.
It is worth noting that this technique can cause something called “pattern curling.” It occurs when shingles curl and blow in the wind where columns join, due to the lifting of the shingles to place and nail the next. If it happens, water might get beneath and cause leaks where the columns join.
Because of the risks, it might void the warranty where leaks and useful life are concerned. However, it is not an uncommon technique for contractors.
FAQ
Do I need to underlay before installing shingles?
Installing underlayment is a great way to protect your floors from leaks and water damage.
What is the lowest air temperature for roof shingles?
The right weather is key to a successful installation. Make sure you wait until temperatures average 55 degrees Fahrenheit before installing shingles in your home.

With over 12 years of construction industry experience, David Bitan specializes in restoring, inspecting, maintaining, and repairing roofs for residential, industrial, and commercial properties.
We Turn Every Project Into A Hive Of Excellence
-

Masterful Craftsmanship
Our skilled team merges art with function to ensure every roof is a testament to expert craftsmanship and quality.
-

Fast & Efficient
Time is of the essence, and we value yours. Count on our prompt and efficient service for all your roofing needs.
-

Guaranteed Satisfaction
Happiness is our benchmark. Experience peace of mind with our 100% Satisfaction Guarantee on every project.

Our mission at Bumble Roofing is to set new standards in quality by ensuring clients receive top-tier service, world-class materials, and an enduring roof over their heads.