How to Install a Roof Vent
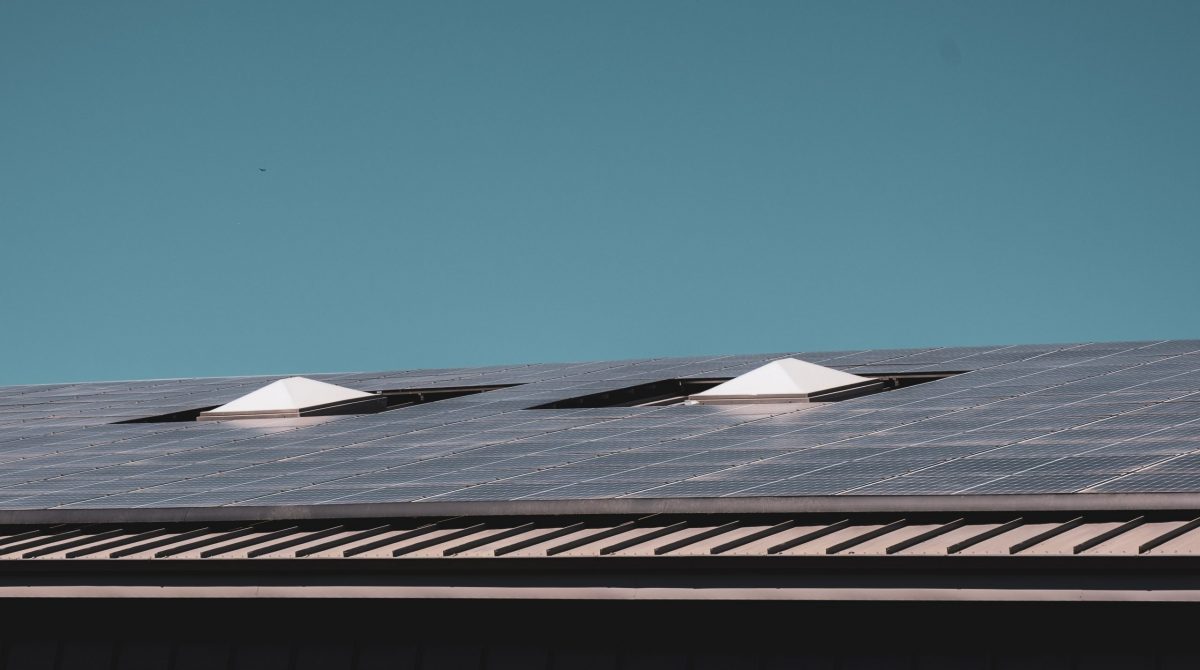
Poor ventilation can lead to a lot of problems, including the growth of mold and mildew. Roof vents help with that, allowing moisture to leave a house and lowering the risk of such problems. There are also quite a few effective vents, with some of the ones you might commonly see including soffits and static exhaust vents. There are also ridge vents, which go all the way across the roof.
Perhaps the best part is that the installation of vents is an easy project you can easily do yourself with the right tools. If it sounds like a project you want to give a shot, check out the article below, where you will find sections on each of the three vent types mentioned above.
License: Creative Commons
Soffit Intake Vents
These roof vents are a great choice to prevent ice dams, cool attic space, and help with air circulation. Often, they are installed beneath the eaves of a Simi Valley roof, and they are not terribly difficult to install. The process involves checking for wiring, outlining the area, drilling holes, cutting out the rectangle, and installing the vent.
License: Creative Commons
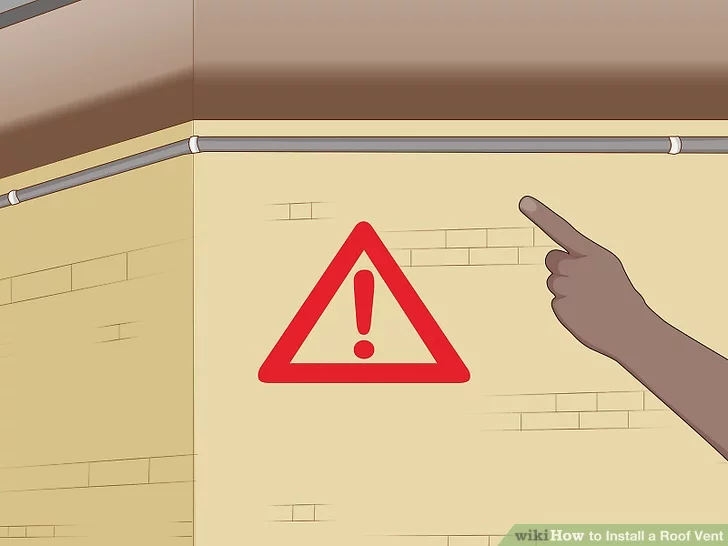
Check for Wiring
The presence of wiring means you will need to find a new place for your soffit vents, so make sure there is nothing that could get in the way of your work. That involves moving away insulation to check from within the attic. Assuming there is nothing to get in your way as you work from outside, you are good to go.
One thing you should do to avoid a misstep is drill a hole from inside the attic. Put it directly in the center of the area you want to put the vent, allowing it to serve as a visual marker for where to start sawing later.
License: Creative Commons
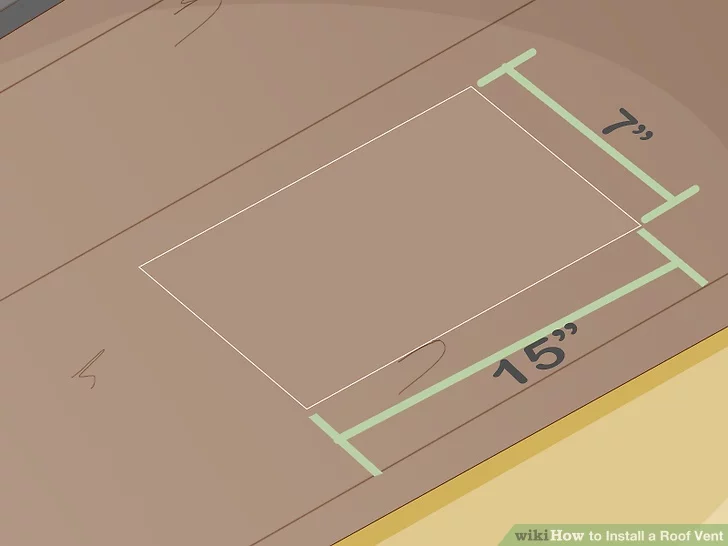
Outline the Area
At this point, you should have a decent idea where you want to put your soffit vents. Now, you need to outline an area for each one that is approximately 7 inches by 15 inches. When doing this, pay attention to nail lines and seams in the paint, which can show the location of the rafters in the attic.
A soffit vent is installed below an overhang, so you want to use a straightedge and writing implement to draw a rectangle where you plan to put the vent. An easier way than drawing each outline by hand is creating a template with cardboard or another lightweight material and tracing it for straight lines and correct dimensions.
Additionally, keep in mind the size of the vents you plan on installing, as that might change the size of the outline you need to draw.
License: Creative Commons
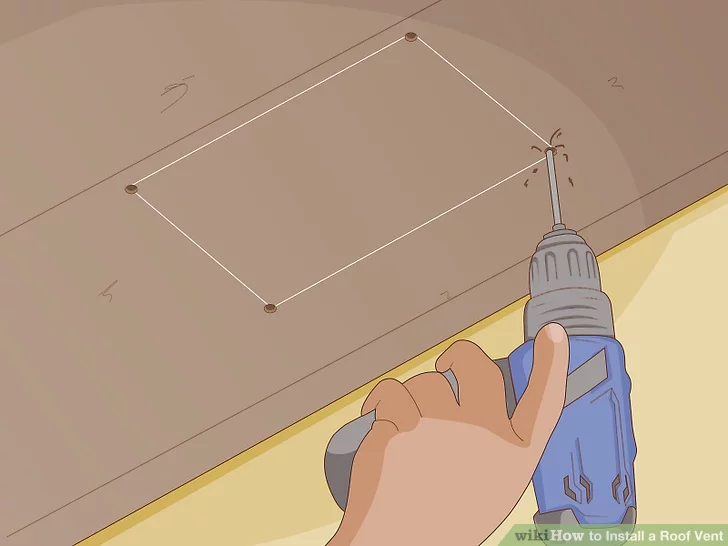
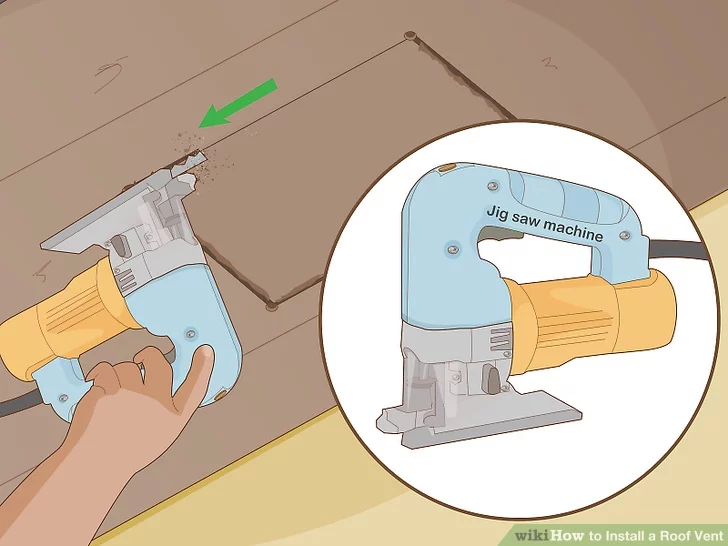
Drill Holes and Cut
Start by getting a drill bit large enough to loosely fit the saw blade you are using inside the holes you place. Then, drill a hole at each of the corners, which will make things easier on the saw when you get to drilling.
During the drilling and sawing, you need to make sure you take safety into consideration. Ensure the ladder is steady, there will be no problem with any cords, and that you are wearing safety glasses to prevent sawdust from irritating your eyes.
License: Creative Commons
After drilling the holes, grab your jigsaw and start cutting out a rectangle, following the outline you drew previously. You want to start by placing the blade into a hole at one of the corners. From there, it is just medium speed from one hole to the next until the job is done, adjusting the blade using the holes.
It is also a good idea not to drill from directly beneath the area. That could cause the wood to hit you once you finish the cut.
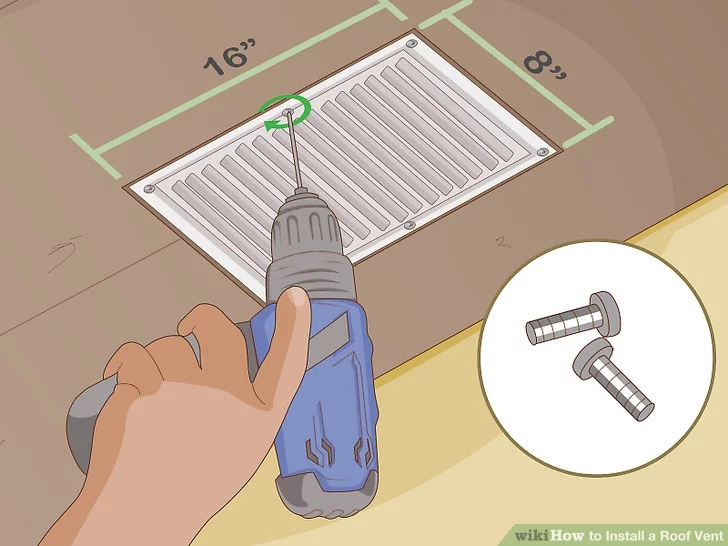
Place the Vent Cover
Assuming you followed the above directions, you want to use a 8-inch by 16-inch cover over the hole. Using wood screws is the best choice to secure it, starting with the corner screws. Most vents have four or six screw holes, so after the corners, you might have a few more to add.
License: Creative Commons
Sometimes, screwing in a soffit vent can be awkward. The safest and easiest way to get it done is by using your dominant hand to work the drill with a screwdriver bit. You can use your other hand to keep the vent steady until you get a few screws in place.
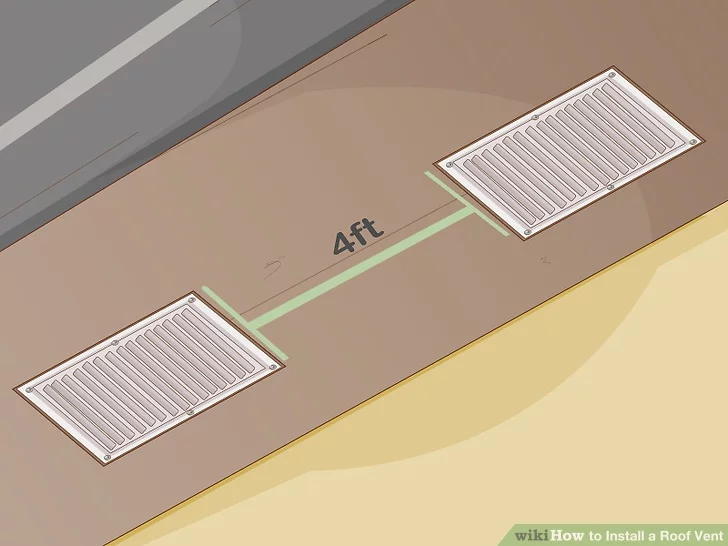
Place Additional Soffit Vents
A single soffit vent is not enough to do things properly. Instead, you want to put one in every four feet or so, using as many as you need. Just start with one and use it to measure out the distance to the edge of the next, then use your template.
The rule of thumb is a single square foot of ventilation per 300 square feet in a house. You also want about half and half for intake and exhaust vents. Lastly, a good tip to keep things from crawling through your vents is to add a layer of window screen in them.
License: Creative Commons
Static Exhaust Vents
Soffit vents are great as intake vents, but you want to balance intake and exhaust vents for proper circulation. That is where static exhaust vents come into play, allowing air to escape from the attic. The process involves marking the area for the vent, removing the shingles and cutting a hole, securing the vent, and adding shingles back to finish it up.
Mark the Location
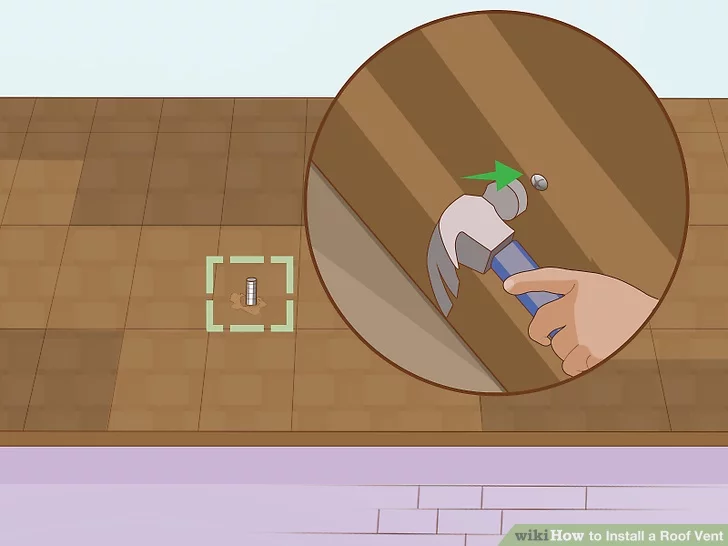
Once again, you want to mark the location for the vent ahead of time. In the case of a static exhaust vent, you can drive a nail through the attic. Doing this will either cause it to be visible on the outside or raise the shingle enough to be noticeable.
As for where to drive the nail through, pick a place two or more feet from the peak of the roof, ensuring it is between the rafters and leaves plenty of space for the vent. You can also perform this step with a drill if space is tight.
License: Creative Commons
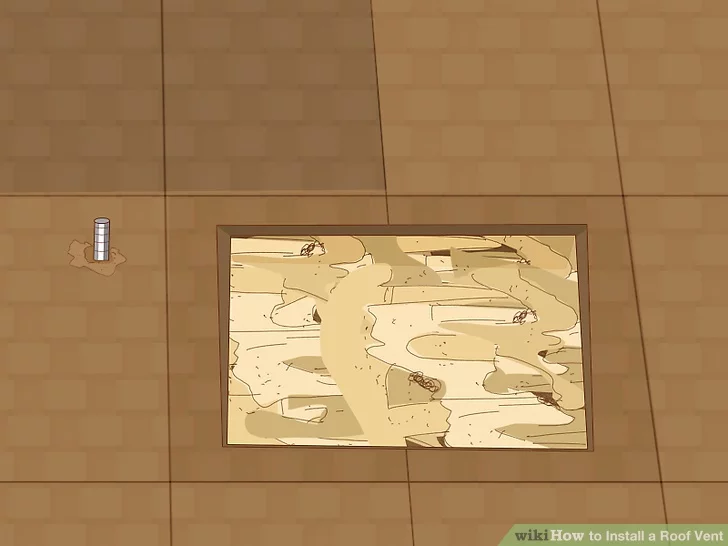
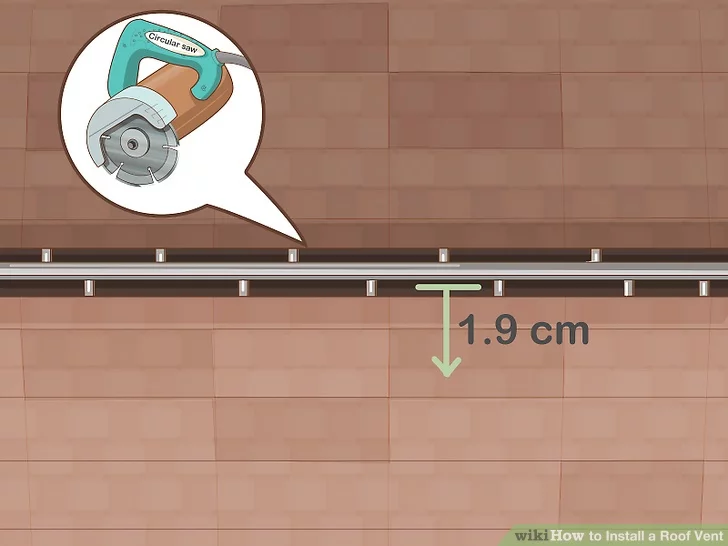
Clear the Shingles and Cut a Hole
To proceed, you will need to get on the roof, meaning you will need a ladder. Once you are up there, find the nail and use a claw hammer to get rid of the shingles around it. You want to clear as many as necessary to fit the opening on the bottom of the vent, making enough room for it to go down.
Alternatively, you can cut out shingles with a utility knife. You might also find it useful to draw an outline the same size as the vent, especially if you did not cut a precise amount. Of course, if you do not feel comfortable getting on the roof, professionals can get this type of work done quickly.
License: Creative Commons
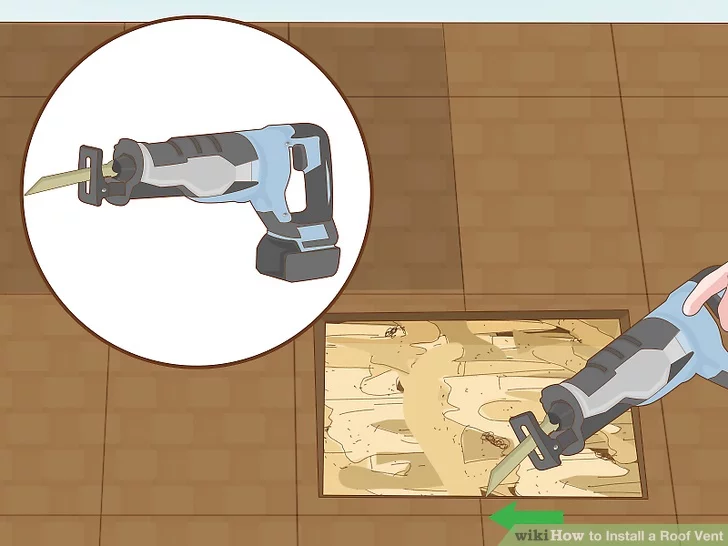
If you decide to do it yourself, finish the outline and use a circular or reciprocating saw to cut a hole. Be careful to set the depth to only cut through the top of the roof without affecting what is below, such as the rafters. Cutting is simple if you follow the outline, and once you are done, you can discard the boards.
Another option, assuming you have a roofing cutting blade for your saw, is taking care of the shingles and roof at the same time. If done correctly, it makes putting in the vent easy. Just do not forget safety glasses, regardless of what method you choose.
License: Creative Commons
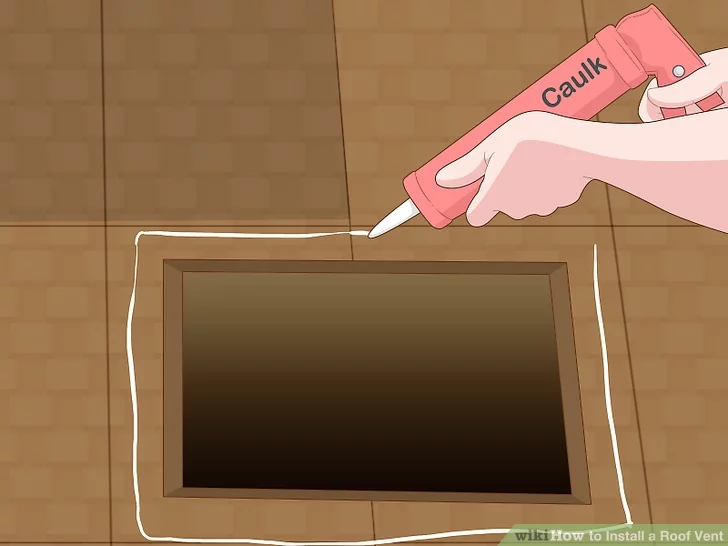
Caulk and Secure
Once the shingles and hole are in place, lay down caulk or tar, preferably using an easy applicator tube. Make sure the adhesive is even all the way around the edges, then place the vent and apply pressure until it sticks.

License: Creative Commons
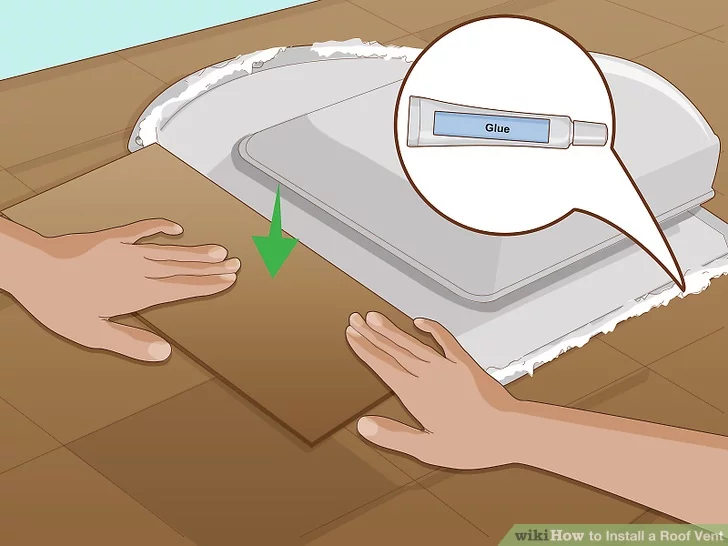
The adhesive does a good job of keeping it in place, but it is not secure. To ensure things stay in place, you want to secure the vent with nails or screws. Some will even have holes to make this easier. Even if there are no holes, place the nails or screws every four or five inches.
License: Creative Commons
Glue Down Shingles
The final step is placing shingles over the bottom of the vent, which requires the use of adhesive. You can use tar or caulk, which you will apply atop the bottom flap. Apply pressure, then use a nail at the top of each of them to secure the shingles to the roof. By the end, the entire flap should be covered. If you are having trouble, cut the shingles to fit.
License: Creative Commons
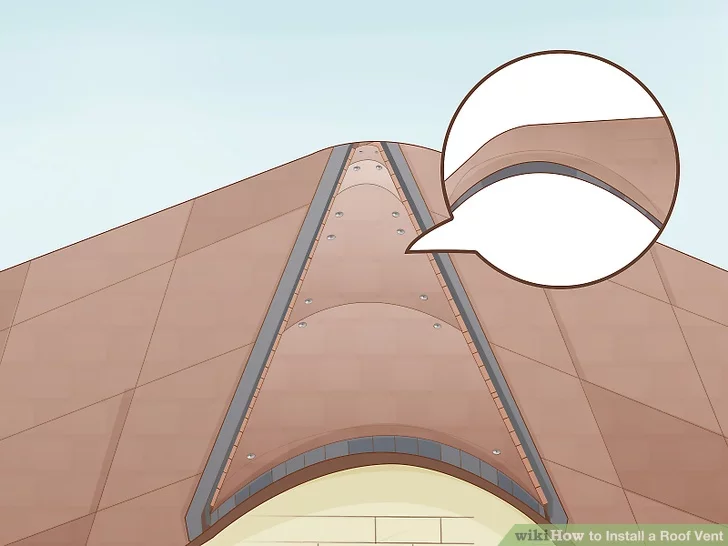
Ridge Vents
Ridge vents are considered a very efficient choice, and they are an affordable one on top of that. In fact, many experts suggest ridge vents over other options. To install ridge vents, you will need to remove the ridge cap shingles, cut a slot, place the ridge vents, secure the vents, and replace the ridge cap shingles.
Remove the Ridge Cap Shingles
Step one is removing the ridge cap shingles, which are located at the peak of the roof and shaped like upside-down Vs. Once again, this requires you to get on top of the roof, where you will have to pry the shingles away from the roof with a claw ladder. But do not get rid of them since they will be used later.
License: Creative Commons
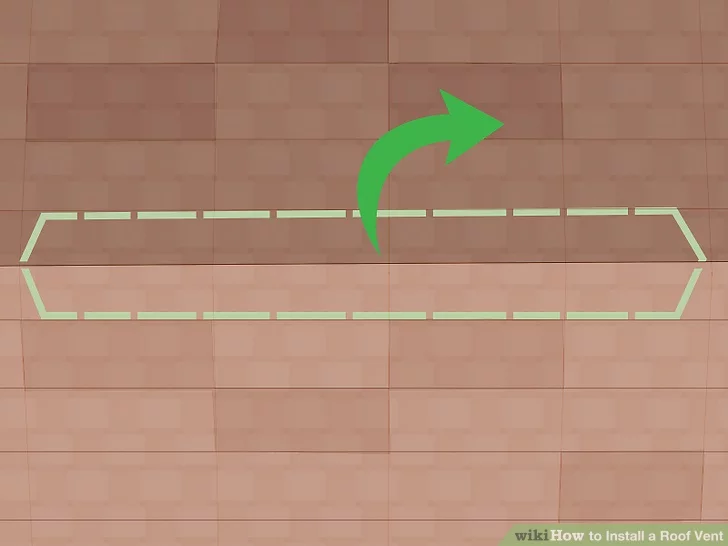
Cut a Slot at the Peak
With the peak exposed, the next step is cutting a slot around ¾ of an inch down from both sides of the peak. Use a circular saw to do this, pushing it to create a straight line from one end of the peak to the other. Just make sure to set the depth so that it only cuts the surface and not the rafters below.
While the above is a simple way to get your ridge vents done right, they can also be placed in sections instead of going all the way across the roof. The way you cut depends on what you want. No matter what, make sure to remove the debris when you are done.
License: Creative Commons
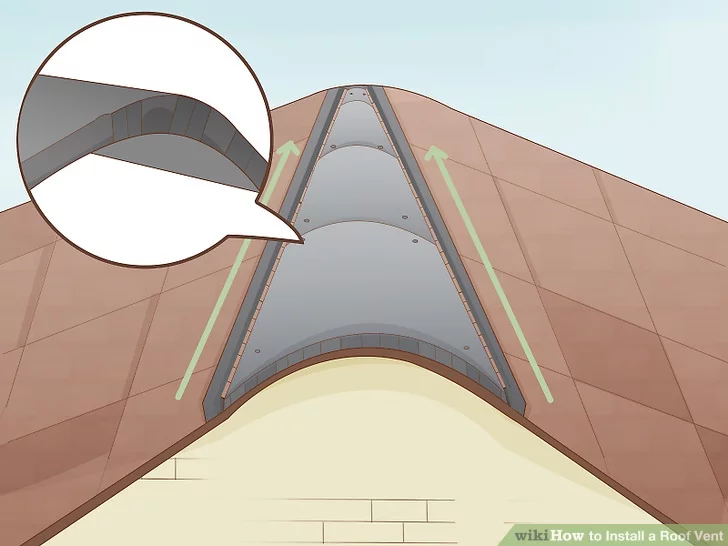
Place and Secure the Ridge Vents
The ridge vents go directly over the slot, covering every inch. They need to be centered on the peak, with the sides laying flat on the surface of the roof. If you need to cut the ridge vents at the end of the roof to make everything fit, use a utility knife and ensure it is flush.
You will want to hold ridge vents in place until you have a chance to nail them down, which you will do by driving a nail through pre-drilled holes. Just make sure the nails are long enough to go through the vents and roof, securing the vents tightly against the surface of the roof.
License: Creative Commons
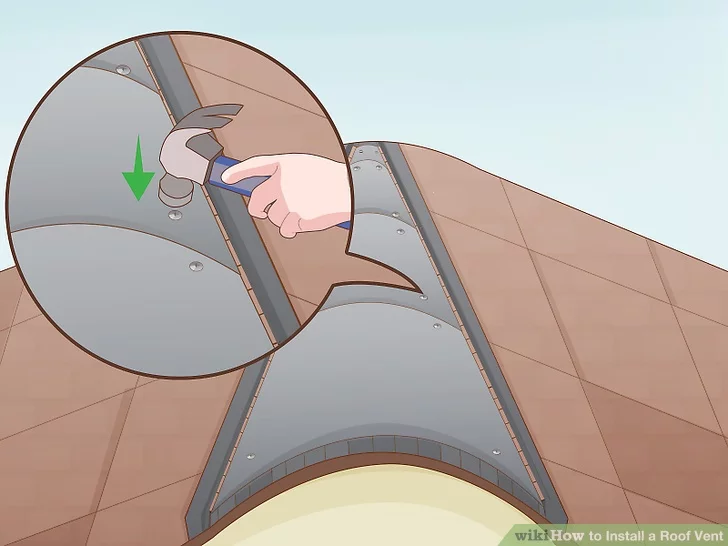
Replace the Ridge Cap Shingles
The last thing you need to do is replace the ridge cap shingles. That being said, it is more for aesthetics than anything else since it allows the ridge vents to blend with the rest of the roof.
License: Creative Commons
If you decide to do it, layer the shingles atop the vent and nail them down through the vent to secure them. You will want to ensure they go into the roof to prevent them from blowing away with bad weather.

With over 12 years of construction industry experience, David Bitan specializes in restoring, inspecting, maintaining, and repairing roofs for residential, industrial, and commercial properties.
We Turn Every Project Into A Hive Of Excellence
-

Masterful Craftsmanship
Our skilled team merges art with function to ensure every roof is a testament to expert craftsmanship and quality.
-

Fast & Efficient
Time is of the essence, and we value yours. Count on our prompt and efficient service for all your roofing needs.
-

Guaranteed Satisfaction
Happiness is our benchmark. Experience peace of mind with our 100% Satisfaction Guarantee on every project.

Our mission at Bumble Roofing is to set new standards in quality by ensuring clients receive top-tier service, world-class materials, and an enduring roof over their heads.